Step 1. To play a copied/ripped DVD from hard disk you can use VideoLAN (VLC Player): Click here to download this player
Step 2. Install it. Start VideoLAN (click Start -> Programs -> VideoLAN -> VLC Media Player)
Step 3. Click File -> Open Directory. Find the VIDEO_TS folder, select it and click OK.
Please note, you have to copy all the ripped data to the right place. Create a VIDEO_TS folder and copy all the ripped files there.
Other solutions:
In order to play a copied DVD with WinDVD you must right-click on the player (menu will pop up), choose Source -> DVD From Folder, find and open your VIDEO_TS folder.
To play a copied DVD with PowerDVD you click on the open button and choose Open DVD File from the Hard Disk Drive and open the video_ts.ifo.
To play VIDEO_TS using ANY PLAYER download and install MPEG2 Decoder. After that, find your VIDEO_TS folder and open VOB files (such as VTS_01_1.VOB, VTS_01_2.VOB, VTS_01_3.V0B etc.).
Let's explain what is inside VIDEO_TS:
VIDEO_TS.IFO, VTS_01_0.IFO - are configuration files with information about how to play exactly all video and audio content of DVD (including menus, subtitles, aspect ratio, languages etc.).
VIDEO_TS.BUP, VTS_01_0.BUP - backup of configuration files.
VTS_01_1.VOB, VTS_01_2.VOB, VTS_01_3.V0B, ... - files with video and audio data.
Nov 16, 2009
How to remote control windows from Ubuntu
Everyone should be able to control remote windows by Remote Desktop Connection application, but don't know how to connect to windows in linux platform.
You can fetch it from here.
That's a easy procedure for you.
1. Enable remote desktop function in windows first. You can follow below diagram to activate remote desktop and add aaa account that is a example account and password is aaa in windows platform.

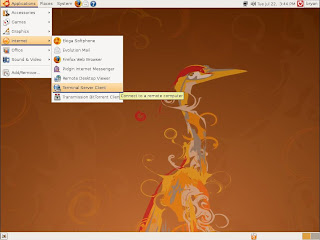
2. Select Applications --> Internet --> Terminal Server Client in Ubuntu
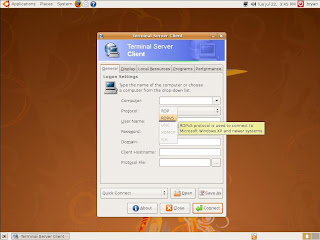
3. It will pop-up a configuration window of Terminal Sever Client, please chose RDPv5 in the Protocol table.
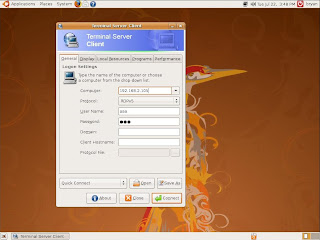
4. Please click Connect button after filled all information.
Computer: Destination host IP address
User Name: aaa
Password: aaa
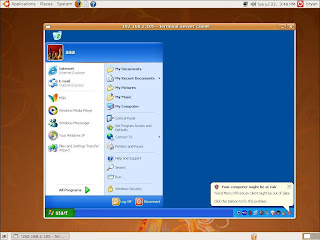
5. You will connect to destination computer successfully. The snapshot as below
You can fetch it from here.
That's a easy procedure for you.
1. Enable remote desktop function in windows first. You can follow below diagram to activate remote desktop and add aaa account that is a example account and password is aaa in windows platform.

2. Select Applications --> Internet --> Terminal Server Client in Ubuntu

3. It will pop-up a configuration window of Terminal Sever Client, please chose RDPv5 in the Protocol table.

4. Please click Connect button after filled all information.
Computer: Destination host IP address
User Name: aaa
Password: aaa

5. You will connect to destination computer successfully. The snapshot as below

Enabling Yahoo accounts with pidgin
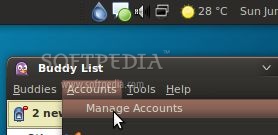
Open Pidgin and go to Accounts -> Manage Accounts...
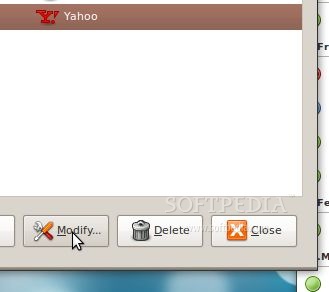
· Click on the Yahoo account and then on the "Modify" button...
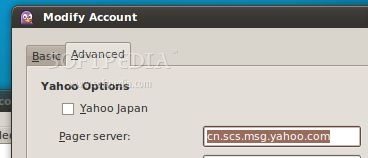
· Click on the "Advanced" tab and paste the following line in the "Pager server" field...
cn.scs.msg.yahoo.com
Click the "Save" button, then click the check box in front of the Yahoo account to connect.
 |
· Click on the Yahoo account and then on the "Modify" button...
 |
· Click on the "Advanced" tab and paste the following line in the "Pager server" field...
cn.scs.msg.yahoo.com
 |
Click the "Save" button, then click the check box in front of the Yahoo account to connect.
Nov 8, 2009
12 Awesome French Short Animations
Oktapodi (Gobelins)

Trying to scape of a assistant chef, two octopus find them selves into a funny runaway for theirs lives. This great animation was nominated for the Oscars Academy Award on the category of short film (animated), almost at the same level of Presto from Pixar.
Made by: Julien BOCABEILLE, François-Xavier CHANIOUX, Olivier DELABARRE, Thierry MARCHAND, Quentin MARMIER and Emud MOKHBERI
Hugh (esma)

A great animation school from Montpellier bring to us this great animation when an old shaman was telling a story to 3 young children. Ages ago, some human beings had big troubles because the sky was too low. Birds could not fly and men were bended, until one day…
Made by: MATHIEU NAVARRO, SYLVAIN NOUVEAU, AURORE TURBE and FRANCOIS POMMIEZ
Mon(s)tre (lisaa)

This is a strange story about our perception of time, it could be relative for each person or statics for others, but at the end we have so many issues with it, that it depends of us how we use it. This is an animation inspired by the universe of Myiazaki, was made as a final carrier project of a 2d animation school.
Made by: Geofforel Ridel , Yann Poyac and Charless Chneck
Blind spot (gobelins)

Another great animation from Gobelins as a third year project, this is the story of an unlucky thief get in to a market trying to make his job, but in the market an old and almost blind lady finish her purchase and go home. At the end everything could be confused, or really clear for the police.
Made by: Johanna BESSIERE , Cécile DUBOIS HERRY, Simon ROUBY, Nicolas CHAUVELOT, Olivier CLERT and Yvon JARDEL.
Pirates (Gobelins)

Another beautiful animation from this school made as an opening short for the Annecy 2006 international animation festival. Is basically 2D traditional animation with some scenes made in 3D, the result its a great and clean animation with a funny story.
Made by: Yves BIGEREL, Bruno DEQUIER, Ben FIQUET, Nicolas GUEROUX, Julien LE ROLLAND
up (Emile Cohl)

An animation based on a colorful confrontation between a young artist trying to express herself by tagging on the streets of a gray city and a boring house-painter who is constantly having to cover up graffiti, even this could be the reality of a city like Paris or New York.
Made by: Marie-Clémence Gautier
Sigg Jones (supinfo)

What could happen when the heavy weight champion wrestler Sigg Jones drinks a strange Power drink? he loses control of himself unleashing all the good he had… This is one of my favorites animations by the dynamic of the characters movements, this was made by three students from Supinfocom School in France, using 3DSmax.
Made by: Mathieu Bessudo, Douglas lassance and Jonathan Vuillemin
La main des maitres (Eesa)

From the George Mellies school as a third year animation project this is the history of two young working on the middle of a big war, trying to make the things worth for the people on the city even if they have to risk their lives, trying to make the message. A great storyline with a mix of techniques
Made by: Looky , Clément Delatre and Adrien “CaYuS” Toupet
Animadanse (Eesa)

A dream come true for a cleaning guy when he discovers a new spice of monsters who love him, he became what he’s always dreamed. A great mix between 3d animation and reality, and a good domain of the human body animation put in to a break dancer character, which is no to easy.
Made by: Julien Badoil , Bertrand de Becque and Larson Liberin de Shoriba Diop
Jungle jail (esma)

Montpelier bring to us another cool animation about a young little man who arrived in a prison where the strongest prisoner is the boss, and the other are his slaves, until the moment of the confrontation between the two principal characters, anything can happen in this prison, even you could became the most powerful guy on the place.
Made By: Mathieu Arnoux, Jugo Cierzniak , Bruce Nguyen Van Lan and Aimeric palermo
Gary (supinfo)

From Supinfo school we have this beautiful animation made in 3d but with a look 2d , the story of a little boy who is in love of his beautiful and older girl-friend, he dreams with waiting for the day when he’ll be older and she loves him back.
Made by: Yann Benedi , Quetin Chaillet and Clement Soulmagnon
A Quoi Ca Sert L’Amour (bonus1)

An old student of Les Gobelins made this great 2d animation based on Edith Piaf song. It could be your love history as a normal couple like the others, with all the good and bad things this would bring to you. The most important… right now he works in pixar.
Made by: Louis Clichy
Galactic Mail (bonus2)

A beautiful animation made by Douglas Lassance and Jonathan Vuillemin (the guys behind Sigg Jones), you’ll recognize their animation style and rhythm. This is a story about and intergalactic space race between FedEx and UPS.
Produced by The Mill
Reference: http://www.blog.exxcorpio.com/2009/06/29/12-awesome-french-short-animations/
Nov 6, 2009
Ubuntu for your grandmother
This article was recently featured in Full Circle magazine. Please visit their site or download the edition here .

They say its for geeks, they say its for nerds, they say its for those whose pinkie finger has the imprint of the enter key tattooed on it. We say its for your grandmother ! Yes my friends, I kid you not, for all of those who are afraid to dip their little toe into the great Linux-Lake let us reassure you : If your grandmother can do it ? So can you. Before we start , let me clarify : We are not talking about turning your Linux machine into a clustered database server with SQL, PHP, Apache, Samba and what have you. We are talking about the advantages of using Linux .. as a desktop.
Why this experiment.
I have been toying around with Linux since 1999, Seen the first desktop versions evolve and have seen the Linux OS grow in strength on the desktop. Last year I found out about Ubuntu Linux and have been doing several articles and podcasts on the use of Ubuntu as a desktop system. I am by no means a Linux zealot ! No pingu-pimping for me ! Drop me in the Linux command line and I'm as lost as Debby Harry in a hair salon. I do however have a philosophy about computer use. I think technology should be safe and simple and that a computer should work for you and not the other way around. Linux has always been seen as to hard and to complicated. So it was time for a little experiment. Could we put together a Linux desktop system that was simple to use, safe from virusses spam and user mistakes, and had a lot of software to offer. Could we build a Linux box that your grandma could use ? Well , lets see.
Step one : Find a grandmother.
My fiancé's family is pretty tech savvy , her dad is a computer wizz, her mother is on MSN messenger all day, her sisters live on line and her grandmother .. is right up the alley. Its not that they are all computer freaks out there , they all just have an open mind towards technology. Good old granny started out on her gaming trip some fifteen years ago when she swiped a hand-console Tetris game from one of her grandchildren. An all night-gaming rush that night got her hooked on these little hand held gaming consoles. Some two years ago she got a second hand worn down IBM Thinkpad laptop running windows 95 for running some simple games like .. surprise surprise.. Tetris and stuff. So when she called me last week in a panic that she accidentally deleted some shortcuts and 'could not get her games to work anymore'and in her despair, was even suggesting buying herself a brand new laptop .. it was time to jump in .


Step Two : Find a laptop
Finding a laptop for cyber-granny was not all that hard. My fiancé's dad had an old Compaq laptop lying around that was no longer in active duty. With an 800 mhz Processor and 256 meg of ram it had been set out to pasture because of a defective PCMCIA slot on the motherboard. Apparently force feeding a PCMCIA card upside down into its slot does not bode well for the laptop. So it did no longer have wireless capability and since the family had bought a new laptop .. it was just laying around. One discarded laptop, one grandma in need .. Cheque please !
Step Three : Somebody get me a penguin.
With our laptop secured under our arm it was time to browse trough some available operating systems to help “La mama” out. The quota's that needed to be met were :
A : Be simple in use.
B: be safe from mallware virusses and user-boo-boo's.
C: offer enough software without having to take on a loan to get you started.
This kind of ruled out Windows XP pro right off the bat. Several Linux distributions offered themselves up but thanks to the fantastic automatix script, Ubuntu took the cake.
So it was time to let loose the beast. Downloading a standard iso Image from the 5.10 version was about 20 minutes work and the whole installation process took about an hour. The simple installation only bothered us with the country settings, keyboard layout and a user name. No problem there. We let it have the entire hard disk at its disposal so we did not have some boot loader clogging up the startup process. As easy as firing up a toaster was the objective here.
When the bongo's rumbled to announce the first successful boot up we went straight to the Synaptic package manager and started adding games to our installation. Ubuntu comes with some games in the standard configuration, but when you look in Synaptic its like uncovering the lost island of Arcadia. Some games are action based , a lot of them are brain breakers and stuff. Ideal for our test subject. We loaded the distro up with some 100 some games and that was that.
Now what do you do when you've beat Tetris for the 500th time and can't see another polygon for the rest of the evening ? You watch a movie right ? Unfortunately most Linux distributions come without support for playing mpeg2 (dvd's) and mp3 support. It has to do with some legal stuff if i remember correctly. But with Ubuntu we have a little solution for this called : The automatix script. These three lines of code will give you a little GUI in the system menu where you can select all the goodies you want. Realplayer, WMV support , Skype, DVD playback etc...
Its a simple as pie : Enter these three lines of code in your terminal window.
sudo apt-get install xterm
wget http://beerorkid.com/automatix/automatix_5.1-1_i386.deb
sudo dpkg -i automatix_5.1-1_i386.deb
When you go into the systems menu and look for the automatix application. We selected MP3, WMV, DVD playback and Flash support. Once OK is clicked, Ubuntu does it all for you. For those who are interested HERE is the automatix manual

Step Four : Sense some simplicity.
Now its no good to have a complicated system for our super granny now is it. Time to simplify the whole deal.
Step one : Automatic Login. In the settings menu you can choose the AUTOLOGIN feature. This makes sure our little laptop boots up straight into the users desktop. No login/password combinations but hey .. its not like she's typing up memo's for the pentagon.

Step two : Could i see the menu please ? thanks to the Gnome desktop the menu is pretty simple as it is (somehow the KDE setup is just too “U-bundant” for me. But a lot of options on the menu where just not needed. So we added the games menu, the dvd and cd player icon and the shutdown icon to the main menu bar and removed everything else. Next up the menu bar was set at the bottom of the screen and the bar you see below was set up top. I left an icon for the main “start” menu there so I could access all the other programs and settings if needed.

- Step three : Explaining how it works : Ok Grann, here is how it works. Press the blue button to start up the computer. Wait until you hear the music. Then you have four buttons on the bottom on the screen. One will give you a menu with ALL the games. If you want to play a movie, just pop in a dvd and click on the second button with the little film reel on it. Want to play some music ? pop in the music cd and click on the little cd. And to shut down the system just click on the little door there.
Thats it , half an hour later granny was trained into using the computer, had a shit load of games to choose from, could play movies and music cd's and was able to boot up and shutdown her system without ever having to worry about pressing the wrong button. Who EVER said Linux was hard ?
Conclusion.
Needless to say , Nana was thrilled. She had a stable and secure operating system and did not have to worry about pressing the wrong buttons because quite frankly .. there where none. A grin as wide as the Brooklyn bridge spread across her face when she saw the entire selection of games she could play and not have to worry about breaking anything in the process. “ This is much easier than the previous one” she uttered casting a wayward glance to her old Windows computer.
I”ll be keeping tabs on our cyber-grandmother in the next few weeks to see how she gets along with her new system.
Now with computers coming more and more abundant in our everyday lives, its natural that everybody wants one, including everyone in your family. But as the family-computer-geek (and professional IT consultant) it would just turn into a nightmare providing support for everyone. So using a simplified Ubuntu installation does keep calls about viruses, broken os'es and spy-ware away. Even if she decided to go on line, I would just have to add the Firefox and Gaim buttons to her menu bar, give her a crash course in chat'n-surf and she would be on her way. No high maintenance on this operating system. So to round it up ? Who ever said Linux was hard and complicated. When handled right it can be a simpler and safer operating system to plant down in the soil of an unexperienced user. Ok , you can't install all the cd's you see in the shop, but Linux comes with all these goodies built in ! This way you even save money. So the question is : Have you seen your granny lately ?

If you think this article rocks you might want to check out our other Ubuntu Manuals
Feisty Fawn for the Family part one : Setting up a Feisty server and controlling it with WEBMIN.
Feisty Fawn for the Family part two : Frighteningly simple filesharing for the family
Feisty Fawn for the Family part three : Torrentfun with a Torrentflux server
and more Tech Articles
Ref: http://www.knightwise.com/content/view/154/9/
Linux tips every geek should know
#1: Check processes not run by you
- Difficulty: Expert
- Application: bash
Imagine the scene - you get yourself ready for a quick round of Crack Attack against a colleague at the office, only to find the game drags to a halt just as you're about to beat your uppity subordinate - what could be happening to make your machine so slow? It must be some of those other users, stealing your precious CPU time with their scientific experiments, webservers or other weird, geeky things!
OK, let's list all the processes on the box not being run by you!
ps aux | grep -v `whoami`
Or, to be a little more clever, why not just list the top ten time-wasters:
ps aux --sort=-%cpu | grep -m 11 -v `whoami`
It is probably best to run this as root, as this will filter out most of the vital background processes. Now that you have the information, you could just kill their processes, but much more dastardly is to run xeyes on their desktop. Repeatedly!
#2: Replacing same text in multiple files
- Difficulty: Intermediate
- Application: find/Perl
If you have text you want to replace in multiple locations, there are several ways to do this. To replace the text Windows with Linux in all files in current directory called test[something] you can run this:
perl -i -pe 's/Windows/Linux/;' test*
To replace the text Windows with Linux in all text files in current directory and down you can run this:
find . -name '*.txt' -print | xargs perl -pi -e's/Windows/Linux/ig' *.txt
Or if you prefer this will also work, but only on regular files:
find -type f -name '*.txt' -print0 | xargs --null perl -pi -e 's/Windows/Linux/'
Saves a lot of time and has a high guru rating!
#3: Fix a wonky terminal
- Difficulty: Easy
- Application: bash
We've all done it - accidentally used less or cat to list a file, and ended up viewing binary instead. This usually involves all sorts of control codes that can easily screw up your terminal display. There will be beeping. There will be funny characters. There will be odd colour combinations. At the end of it, your font will be replaced with hieroglyphics and you don't know what to do. Well, bash is obviously still working, but you just can't read what's actually going on! Send the terminal an initialisation command:
reset
and all will be well again.
#4: Creating Mozilla keywords
- Difficulty: Easy
- Application: Firefox/Mozilla
A useful feature in Konqueror is the ability to type gg onion to do a Google search based on the word onion. The same kind of functionality can be achieved in Mozilla by first clicking on Bookmarks>Manage Bookmarks and then Add a New Bookmark. Add the URL as:
http://www.google.com/search?q=%s
Now select the entry in the bookmark editor and click the Properties button. Now enter the keyword as gg (or this can be anything you choose) and the process is complete. The %s in the URL will be replaced with the text after the keyword. You can apply this hack to other kinds of sites that rely on you passing information on the URL.
Alternatively, right-click on a search field and select the menu option "Add a Keyword for this Search...". The subsequent dialog will allow you to specify the keyword to use.
#5: Running multiple X sessions
- Difficulty: Easy
- Application: X
If you share your Linux box with someone and you are sick of continually logging in and out, you may be relieved to know that this is not really needed. Assuming that your computer starts in graphical mode (runlevel 5), by simultaneously pressing the keys Control+Alt+F1 - you will get a login prompt. Insert your login and password and then execute:
startx -- :1
to get into your graphical environment. To go back to the previous user session, press Ctrl+Alt+F7, while to get yours back press Ctrl+Alt+F8.
You can repeat this trick: the keys F1 to F6 identify six console sessions, while F7 to F12 identify six X sessions. Caveat: although this is true in most cases, different distributions can implement this feature in a different way.
#6: Faster browsing
- Difficulty: Easy
- Application: KDE
In KDE, a little-known but useful option exists to speed up your web browsing experience. Start the KDE Control Center and choose System > KDE performance from the sidebar. You can now select to preload Konqueror instances. Effectively, this means that Konqueror is run on startup, but kept hidden until you try to use it. When you do, it pops up almost instantaneously. Bonus! And if you're looking for more KDE tips, make sure you check out our article, 20 all-new KDE 4.2 tips.
#7: Backup your website easily
- Difficulty: Easy
- Application: Backups
If you want to back up a directory on a computer and only copy changed files to the backup computer instead of everything with each backup, you can use the rsync tool to do this. You will need an account on the remote computer that you are backing up from. Here is the command:
rsync -vare ssh jono@192.168.0.2:/home/jono/importantfiles/* /home/jono/backup/
Here we are backing up all of the files in /home/jono/importantfiles/ on 192.168.0.2 to /home/jono/backup on the current machine.
#8: Keeping your clock in time
- Difficulty: Easy
- Application: NTP
If you find that the clock on your computer seems to wander off the time, you can make use of a special NTP tool to ensure that you are always synchronised with the kind of accuracy that only people that wear white coats get excited about. You will need to install the ntpdate tool that is often included in the NTP package, and then you can synchronise with an NTP server:
ntpdate ntp.blueyonder.co.uk
A list of suitable NTP servers is available at www.eecis.udel.edu/~mills/ntp/clock1b.html. If you modify your boot process and scripts to include this command you can ensure that you are perfectly in time whenever you boot your computer. You could also run a cron job to update the time.
#9: Finding the biggest files
- Difficulty: Easy
- Application: Shell
A common problem with computers is when you have a number of large files (such as audio/video clips) that you may want to get rid of. You can find the biggest files in the current directory with:
ls -lSrh
The "r" causes the large files to be listed at the end and the "h" gives human readable output (MB and such). You could also search for the biggest MP3/MPEGs:
ls -lSrh *.mp*
You can also look for the largest directories with:
du -kx | egrep -v "\./.+/" | sort -n
#10: Nautilus shortcuts
- Difficulty: Easy
- Application: Nautilus
Although most file managers these days are designed to be used with the mouse, it's also useful to be able to use the keyboard sometimes. Nautilus has a few keyboard shortcuts that can have you flying through files:
- Open a location - Ctrl+L
- Open Parent folder - Ctrl+Up
- Arrow keys navigate around current folder.
You can also customise the file icons with 'emblems'. These are little graphical overlays that can be applied to individual files or groups. Open the Edit > Backgrounds and Emblems menu item, and drag-and-drop the images you want.
#11: Defrag your databases
- Difficulty: Easy
- Application: MySQL
Whenever you change the structure of a MySQL database, or remove a lot of data from it, the files can become fragmented resulting in a loss of performance, particularly when running queries. Just remember any time you change the database to run the optimiser:
mysqlcheck -o
You may also find it worth your while to defragment your database tables regularly if you are using VARCHAR fields: these variable-length columns are particularly prone to fragmentation.
#12: Quicker emails
- Difficulty: Easy
- Application: KMail
Can't afford to waste three seconds locating your email client? Can't be bothered finding the mouse under all those gently rotting mountains of clutter on your desk? Whatever you are doing in KDE, you are only a few keypresses away from sending a mail. Press Alt+F2 to bring up the 'Run command' dialog. Type:
mailto:plop@ploppypants.com
Press return and KMail will automatically fire up, ready for your words of wisdom. You don't even need to fill in the entire email address. This also works for Internet addresses: try typing www.slashdot.org to launch Konqueror.
#13: Parallelise your build
- Difficulty: Easy
- Application: GCC
If you're running a multiprocessor system (SMP) with a moderate amount of RAM, you can usually see significant benefits by performing a parallel make when building code. Compared to doing serial builds when running make (as is the default), a parallel build is a vast improvement. To tell make to allow more than one child at a time while building, use the -j switch:
make -j4; make -j4 modules
#14: Save battery power
- Difficulty: Intermediate
- Application: hdparm
You are probably familiar with using hdparm for tuning a hard drive, but it can also save battery life on your laptop, or make life quieter for you by spinning down drives.
hdparm -y /dev/hdb
hdparm -Y /dev/hdb
hdparm -S 36 /dev/hdb
In order, these commands will: cause the drive to switch to Standby mode, switch to Sleep mode, and finally set the Automatic spindown timeout. This last includes a numeric variable, whose units are blocks of 5 seconds (for example, a value of 12 would equal one minute).
Incidentally, this habit of specifying spindown time in blocks of 5 seconds should really be a contender for a special user-friendliness award - there's probably some historical reason for it, but we're stumped. Write in and tell us if you happen to know where it came from!
#15: Wireless speed management
- Difficulty: Intermediate
- Application: iwconfig
The speed at which a piece of radio transmission/receiver equipment can communicate with another depends on how much signal is available. In order to maintain communications as the available signal fades, the radios need to transmit data at a slower rate. Normally, the radios attempt to work out the available signal on their own and automatically select the fastest possible speed.
In fringe areas with a barely adequate signal, packets may be needlessly lost while the radios continually renegotiate the link speed. If you can't add more antenna gain, or reposition your equipment to achieve a better enough signal, consider forcing your card to sync at a lower rate. This will mean fewer retries, and can be substantially faster than using a continually flip-flopping link. Each driver has its own method for setting the link speed. In Linux, set the link speed with iwconfig:
iwconfig eth0 rate 2M
This forces the radio to always sync at 2Mbps, even if other speeds are available. You can also set a particular speed as a ceiling, and allow the card to automatically scale to any slower speed, but go no faster. For example, you might use this on the example link above:
iwconfig eth0 rate 5.5M auto
Using the auto directive this way tells the driver to allow speeds up to 5.5Mbps, and to run slower if necessary, but will never try to sync at anything faster. To restore the card to full auto scaling, just specify auto by itself:
iwconfig eth0 rate auto
Cards can generally reach much further at 1Mbps than they can at 11Mbps. There is a difference of 12dB between the 1Mbps and 11Mbps ratings of the Orinoco card - that's four times the potential distance just by dropping the data rate!
#16: Unclog open ports
- Difficulty: Intermediate
- Application: netstat
Generating a list of network ports that are in the Listen state on a Linux server is simple with netstat:
root@catlin:~# netstat -lnp
Active Internet connections (only servers)
Proto Recv-Q Send-Q Local Address Foreign Address State PID/Program name
tcp 0 0 0.0.0.0:5280 0.0.0.0:* LISTEN 698/perl
tcp 0 0 0.0.0.0:80 0.0.0.0:* LISTEN 217/httpd
tcp 0 0 10.42.3.2:53 0.0.0.0:* LISTEN 220/named
tcp 0 0 10.42.4.6:53 0.0.0.0:* LISTEN 220/named
tcp 0 0 127.0.0.1:53 0.0.0.0:* LISTEN 220/named
tcp 0 0 0.0.0.0:22 0.0.0.0:* LISTEN 200/sshd
udp 0 0 0.0.0.0:32768 0.0.0.0:* 220/named
udp 0 0 10.42.3.2:53 0.0.0.0:* 220/named
udp 0 0 10.42.4.6:53 0.0.0.0:* 220/named
udp 0 0 127.0.0.1:53 0.0.0.0:* 220/named
udp 0 0 0.0.0.0:67 0.0.0.0:* 222/dhcpd
raw 0 0 0.0.0.0:1 0.0.0.0:* 7 222/dhcpd
That shows you that PID 698 is a Perl process that is bound to port 5280. If you're not root, the system won't disclose which programs are running on which ports.
#17: Faster Hard drives
- Difficulty: Expert
- Application: hdparm
You may know that the hdparm tool can be used to speed test your disk and change a few settings. It can also be used to optimise drive performance, and turn on some features that may not be enabled by default. Before we start though, be warned that changing drive options can cause data corruption, so back up all your important data first. Testing speed is done with:
hdparm -Tt /dev/hda
You'll see something like:
/dev/hda:
Timing buffer-cache reads:   128 MB in  1.64 seconds =78.05 MB/sec
Timing buffered disk reads:  64 MB in 18.56 seconds = 3.45MB/sec
Now we can try speeding it up. To find out which options your drive is currently set to use, just pass hdparm the device name:
hdparm /dev/hda
/dev/hda:
multcount    =  16 (on)
I/O support  =  0 (default 16-bit)
unmaskirq    =  0 (off)
using_dma    =  0 (off)
keepsettings =  0 (off)
readonly     =  0 (off)
readahead    =  8 (on)
geometry     = 40395/16/63, sectors = 40718160, start = 0
This is a fairly default setting. Most distros will opt for safe options that will work with most hardware. To get more speed, you may want to enable dma mode, and certainly adjust I/O support. Most modern computers support mode 3, which is a 32-bit transfer mode that can nearly double throughput. You might want to try
hdparm -c3 -d1/dev/hda
Then rerun the speed check to see the difference. Check out the modes your hardware will support, and the hdparm man pages for how to set them.
#18: Uptime on your hands
- Difficulty: Expert
- Application: Perl
In computing, wasted resources are resources that could be better spent helping you. Why not run a process that updates the titlebar of your terminal with the current load average in real-time, regardless of what else you're running?
Save this as a script called tl, and save it to your ~/bin directory:
#!/usr/bin/perl -w

use strict;
$|++;

my $host=`/bin/hostname`;
chomp $host;

while(1) {

open(LOAD,"/proc/loadavg") || die "Couldn't open /proc/loadavg: $!\n";

my @load=split(/ /,);
close(LOAD);


print "$host: $load[0] $load[1] $load[2] at ", scalar(localtime);
print "\007";

sleep 2;
}
When you'd like to have your titlebar replaced with the name, load average, and current time of the machine you're logged into, just run tl&. It will happily go on running in the background, even if you're running an interactive program like Vim.
#19: Grabbing a screenshot without X
- Difficulty: Easy
- Application: Shell
There are plenty of screen-capture tools, but a lot of them are based on X. This leads to a problem when running an X application would interfere with the application you wanted to grab - perhaps a game or even a Linux installer. If you use the venerable ImageMagick import command though, you can grab from an X session via the console. Simply go to a virtual terminal (Ctrl+Alt+F1 for example) and enter the following:
chvt 7; sleep 2; import -display :0.0 -window root sshot1.png; chvt 1;
The chvt command changes the virtual terminal, and the sleep command gives it a while to redraw the screen. The import command then captures the whole display and saves it to a file before the final chvt command sticks you back in the virtual terminal again. Make sure you type the whole command on one line.
This can even work on Linux installers, many of which leave a console running in the background - just load up a floppy/CD with import and the few libraries it requires for a first-rate run-anywhere screen grabber.
#20: Access your programs remotely
- Difficulty: Easy
- Application: X
If you would like to lie in bed with your Linux laptop and access your applications from your Windows machine, you can do this with SSH. You first need to enable the following setting in /etc/ssh/sshd_config:
X11Forwarding yes
We can now run The GIMP on 192.168.0.2 with:
ssh -X 192.168.0.2 gimp
#21: Making man pages useful
- Difficulty: Easy
- Application: man
If you are looking for some help on a particular subject or command, man pages are a good place to start. You normally access a man page with man
man -k login
When you access a man page, you can also use the forward slash key to search for a particular word within the man page itself. Simply press / on your keyboard and then type in the search term.
#22: Talk to your doctor!
- Difficulty: Easy
- Application: Emacs
To say that Emacs is just a text editor is like saying that a Triumph is just a motorcycle, or the World Cup is just some four-yearly football event. True, but simplified juuuust a little bit. An example? Open the editor, press the Esc key followed by X and then enter in doctor: you will be engaged in a surreal conversation by an imaginary and underskilled psychotherapist. And if you want to waste your time in a better way
Esc-X tetris
will transform your 'editor' into the old favourite arcade game.
Does the madness stop there? No! Check out your distro's package list to see what else they've bundled for Emacs: we've got chess, Perl integration, IRC chat, French translation, HTML conversion, a Java development environment, smart compilation, and even something called a "semantic bovinator". We really haven't the first clue what that last one does, but we dare you to try it out anyway! (Please read the disclaimer first!)
#23: Generating package relationship diagrams
- Difficulty: Easy
- Application: Debian
The most critical part of the Debian system is the ability to install a package and have the dependencies satisfied automatically. If you would like a graphical representation of the relationships between these packages (this can be useful for seeing how the system fits together), you can use the Graphviz package from Debian non-free (apt-get install graphviz) and the following command:
apt-cache dotty > debian.dot
The command generated the graph file which can then be loaded into dotty:
dotty debian.dot
#24: Unmount busy drives
- Difficulty: Easy
- Application: bash
You are probably all too familiar with the situation - you are trying to unmount a drive, but keep getting told by your system that it's busy. But what application is tying it up? A quick one-liner will tell you:
lsof +D /mnt/windows
This will return the command and process ID of any tasks currently accessing the /mnt/windows directory. You can then locate them, or use the kill command to finish them off.
#25: Text file conversion
- Difficulty: Easy
- Application: recode
recode is a small utility that will save you loads of effort when using text files created on different platforms. The primary source of discontent is line breaks. In some systems, these are denoted with a line-feed character. In others, a carriage return is used. In still more systems, both are used. The end result is that if you are swapping text from one platform to another, you end up with too many or too few line breaks, and lots of strange characters besides.
However, the command parameters of recode are a little arcane, so why not combine this hack with HACK 26 in this feature, and set up some useful aliases:
alias dos2unix='recode dos/CR-LF..l1'
alias unix2win='recode l1..windows-1250'
alias unix2dos='recode l1..dos/CR-LF'
There are plenty more options for recode - it can actually convert between a whole range of character sets. Check out the man pages for more information.
#26: Listing today's files only
- Difficulty: Easy
- Application: Various
You are probably familiar with the problem. Sometime earlier in the day, you created a text file, which now is urgently required. However, you can't remember what ridiculous name you gave it, and being a typical geek, your home folder is full of 836 different files. How can you find it? Well, there are various ways, but this little tip shows you the power of pipes and joining together two powerful shell commands:
ls -al --time-style=+%D | grep `date +%D`
The parameters to the ls command here cause the datestamp to be output in a particular format. The cunning bit is that the output is then passed to grep. The grep parameter is itself a command (executed because of the backticks), which substitutes the current date into the string to be matched. You could easily modify it to search specifically for other dates, times, filesizes or whatever. Combine it with HACK 26 to save typing!
#27: Avoid common mistypes and long commands
- Difficulty: Easy
- Application: Shell
The alias command is useful for setting up shortcuts for long commands, or even more clever things. From HACK 25, we could make a new command, lsnew, by doing this:
alias lsnew=" ls -al --time-style=+%D | grep `date +%D` "
But there are other uses of alias. For example, common mistyping mistakes. How many times have you accidentally left out the space when changing to the parent directory? Worry no more!
alias cd..="cd .."
Alternatively, how about rewriting some existing commands?
alias ls="ls -al"
saves a few keypresses if, like us, you always want the complete list.
To have these shortcuts enabled for every session, just add the alias commands to your user .bashrc file in your home directory.
#28: Alter Mozilla's secret settings
- Difficulty: Easy
- Application: Mozilla
If you find that you would like to change how Mozilla works but the preferences offer nothing by way of clickable options that can help you, there is a special mode that you can enable in Mozilla so that you can change anything. To access it, type this into the address bar:
about:config
You can then change each setting that you are interested in by changing the Value field in the table.
Other interesting modes include general information (about:), details about plugins (about:plugins), credits information (about:credits) and some general wisdom (about:mozilla).
#29: A backdrop of stars
- Difficulty: Easy
- Application: KStars
You may already have played with KStars, but how about creating a KStars backdrop image that's updated every time you start up?
KStars can be run with the --dump switch, which dumps out an image from your startup settings, but doesn't load the GUI at all. You can create a script to run this and generate a desktop image, which will change every day (or you can just use this method to generate images).
Run KStars like this:
kstars --dump --width 1024 --height 768 --filename = ~/kstarsback.png
You can add this to a script in your ~/.kde/Autostart folder to be run at startup. Find the file in Konqueror, drag it to the desktop and select 'Set as wallpaper' to use it as a randomly generated backdrop.
#30: Open an SVG directly
- Difficulty: Easy
- Application: Inkscape
You can run Inkscape from a shell and immediately edit a graphic directly from a URL. Just type:
inkscape http://www.somehost.com/graphic.svg
Remember to save it as something else though!
#31: Editing without an editor
- Difficulty: Intermediate
- Application: Various
Very long files are often hard to manipulate with a text editor. If you need to do it regularly, chances are you'll find it much faster to use some handy command-line tools instead, like in the following examples.
To print columns eg 1 and 3 from a file file1 into file2, we can use awk:
awk '{print $1, $3}' file1 > file2
To output only characters from column 8 to column 15 of file1, we can use cut:
cut -c 8-15 file1 > file2
To replace the word word1 with the word word2 in the file file1, we can use the sed command:
sed "s/word1/word2/g" file1 > file2
This is often a quicker way to get results than even opening a text editor.
#32: Backup selected files only
- Difficulty: Intermediate
- Application: tar
Want to use tar to backup only certain files in a directory? Then you'll want to use the -T flag as follows. First, create a file with the file you want to backup:
cat >> /etc/backup.conf
# /etc/passwd
# /etc/shadow
# /etc/yp.conf
# /etc/sysctl.conf
EOF
Then run tar with the -T flag pointing to the file just created:
tar -cjf bck-etc-`date +%Y-%m-%d`.tar.bz2 -T /etc/backup.conf
Now you have your backup.
#33: Merging columns in files
- Difficulty: Intermediate
- Application: bash
While splitting columns in files is easy enough, merging them can be complicated. Below is a simple shell script that does the job:
#!/bin/sh
length=`wc -l $1 | awk '{print $1}'`
count=1
[ -f $3 ] && echo "Optionally removing $3" && rm -i $3
while [ "$count" -le "$length" ] ; do
     a=`head -$count $1 | tail -1`
     b=`head -$count $2 | tail -1`
     echo "$a      $b" >> $3
     count=`expr $count + 1`
done
Give to this script the name merge.sh and make it executable with:
chmod u+x merge.sh
Now, if you want to merge the columns of file1 and file2 into file3, it's just matter of executing
/path/to/merge.sh file1 file2 file3
where /path/to has to be replaced with the location of merge.sh in your filesystem.
#34: Case sensitivity
- Difficulty: Intermediate
- Application: bash
Despite the case of a word not making any difference to other operating systems, in Linux "Command" and "command" are different things. This can cause trouble when moving files from Windows to Linux. tr is a little shell utility that can be used to change the case of a bunch of files.
#!/bin/sh
for i in `ls -1`; do
       file1=`echo $i | tr [A-Z] [a-z] `
       mv $i $file1 2>/dev/null
done
By executing it, FILE1 and fiLe2 will be renamed respectively file1 and file2.
#35: Macros in Emacs
- Difficulty: Intermediate
- Application: Emacs
When editing files, you will often find that the tasks are tedious and repetitive, so to spare your time you should record a macro. In Emacs, you will have to go through the following steps:
- Press Ctrl+X to start recording.
- Insert all the keystrokes and commands that you want
- Press Ctrl+X to stop when you're done.
Now, you can execute that with
Ctrl -uCtrl -x e
where
#36: Simple spam killing
- Difficulty: Intermediate
- Application: KMail
Spam, or unsolicited bulk email, is such a widespread problem that almost everyone has some sort of spam protection now, out of necessity. Most ISPs include spam filtering, but it isn't set to be too aggressive, and most often simply labels the spam, but lets it through (ISPs don't want to be blamed for losing your mails).
The result is that, while you may have anti-spam stuff set up on the client-side, you can make its job easier by writing a few filters to remove the spam that's already labelled as such. The label is included as a header. In KMail, you can just create a quick filter to bin your mail, or direct it to a junk folder. The exact header used will depend on the software your ISP is using, but it's usually something like X-Spam-Flag = YES for systems like SpamAssassin.
Simply create a filter in KMail, choose Match Any of the Following and type in the header details and the action you require. Apply the filter to incoming mail, and you need never be troubled by about half the volume of your spam ever again.
#37: Read OOo docs without OOo
- Difficulty: Intermediate
- Application: OpenOffice.org
Have you ever been left with an OOo document, but no OpenOffice.org in which to read it? Thought you saved it out as plain text (.txt), but used the StarOffice .sxw format instead? The text can be rescued. Firstly, the sxw file is a zip archive, so unzip it:
unzip myfile.sxw
The file you want is called 'content.xml'. Unfortunately, it's so full of xml tags it's fairly illegible, so filter them out with some Perl magic:
cat content.xml | perl -p -e "s/<[^>]*>/ /g;s/\n/ /g;s/ +/ /;"
It may have lost lots of formatting, but at least it is now readable.
#38: Find and execute
- Difficulty: Intermediate
- Application: find
The find command is not only useful for finding files, but is also useful for processing the ones it finds too. Here is a quick example.
Suppose we have a lot of tarballs, and we want to find them all:
find . -name '*.gz'
will locate all the gzip archives in the current path. But suppose we want to check they are valid archives? The gunzip -vt option will do this for us, but we can cunningly combine both operations, using xargs:
find . -name '*.gz' | xargs gunzip -vt
#39: Use the correct whois server
- Difficulty: Intermediate
- Application: whois
The whois command is very useful for tracking down Internet miscreants and the ISPs that are supplying them with service. Unfortunately, there are many whois servers, and if you are querying against a domain name, you often have to use one which is specific to the TLD they are using. However, there are some whois proxies that will automatically forward your query on to the correct server. One of these is available at http://whois.geektools.com.
whois -h whois.geektools.com plop.info
#40: Where did that drive mount?
- Difficulty: Intermediate
- Application: bash
A common problem with people who have lots of mountable devices (USB drives, flash memory cards, USB key drives) is working out where that drive you just plugged in has ended up?
Practically all devices that invoke a driver - such as usb-storage - will dump some useful information in the logs. Try
dmesg | grep SCSI
This will filter out recognised drive specs from the dmesg output. You'll probably turn up some text like:
SCSI device sda: 125952 512-byte hdwr sectors (64 MB)
So your device is at sda.
#41: Autorun USB devices
- Difficulty: Expert
- Application: hotplug scripts
Want to run a specific application whenever a particular device is added? The USB hotplug daemon can help you! This service is notified when USB devices are added to the system. For devices that require kernel drivers, the hotplug daemon will call a script by the same name in /etc/hotplug/usb/, for example, a script called usb-storage exists there. You can simply add your own commands to the end of this script (or better still, tag a line at the end of it to execute a script elsewhere). Then you can play a sound, autosync files, search for pictures or whatever.
For devices that don't rely on kernel drivers, a lookup table is used matching the USB product and manufacturer ID. Many distros already set this up to do something, but you can customise these scripts pretty easily. See http://jphoto.sourceforge.net/?selected=sync for an example of what can be done.
#42: Rename and resize images
- Difficulty: Expert
- Application: bash
Fond of your new camera but can't put up with the terrible names? Do you want also to prepare them for publishing on the web? No problem, a simple bash script is what you need:
#!/bin/sh
counter=1
root=mypict
resolution=400x300
for i in `ls -1 $1/*.jpg`; do
       echo "Now working on $i"
       convert -resize $resolution $i ${root}_${counter}.jpg
       counter=`expr $counter + 1`
done
Save the script in a file called picturename.sh and make it executable with
chmod u+x picturename.sh
and store it somewhere in your path. Now, if you have a bunch of .jpg files in the directory /path/to/pictdir, all you have to do is to execute
picturename.sh /path/to/pictdir
and in the current directory you'll find mypict_1.jpg, mypict_2.jpg etc, which are the resized versions of your original ones. You can change the script according to your needs, or, if you're just looking for super-simple image resizing, try looking at the mogrify command with its -geometry parameter.
#43: Secure logout
- Difficulty: Easy
- Application: bash
When you are using a console on a shared machine, or indeed, just on your own desktop, you may find that when you logout, the screen still shows a trace of who was logged in and what you were doing. A lot of distros will clear the screen, but some don't. You can solve this by editing your ~/.bash_logout file and adding the command:
clear
You can add any other useful commands here too.
#44: Transferring files without ftp or scp
- Difficulty: Easy
- Application: netcat
Need to transfer a directory to another server but do not have FTP or SCP access? Well this little trick will help out using the netcat utility. On the destination server run:
nc -l -p 1234 | uncompress -c | tar xvfp -
And on the sending server run:
tar cfp - /some/dir | compress -c | nc -w 3 [destination] 1234
Now you can transfer directories without FTP and without needing root access.
#45: Backing up a Debian package list
- Difficulty: Easy
- Application: Debian
If you are running Debian and have lost track of which packages you are running, it could be useful to get a backup of your currently installed packages. You can get a list by running:
dpkg --get-selections > debianlist.txt
This will put the entire list in debianlist.txt. You could then install the same packages on a different computer with:
dpkg --set-selections < debianlist.txt
You should bear in mind that you would also need to copy over configuration files from /etc when copying your system to a new computer.
To actually install the selections, use:
apt-get -u dselect-upgrade.
#46: Hardening ssh
- Difficulty: Easy
- Application: ssh
Although SSH is a pretty secure way to connect to your server, there are two simple changes you can make that will boost its security even further. First, you almost certainly don't want people logging in directly as root - instead, they should logon as a normal user, then use the su command to switch over. You can change this simply in the /etc/ssh/ssh_config file by adding the line:
PermitRootLogin no
Now the only way to get root privilges is through su, which means crackers now need to break two passwords to get full access. While you are editing that file, find the line which says:
Protocol 2, 1
And change it to:
Protocol 2
This removes the option to fallback on the original SSH protocol, now considered very vulnerable.
#47: Stop replying to pings
- Difficulty: Easy
- Application: sysctl
While ping is a very useful command for discovering network topology, the disadvantage is that it does just that, and makes it easier for hackers on the network to target live servers. But you can tell Linux to ignore all pings - the server simply won't respond. There are a number of ways to achieve this, but the best is to use sysctl. To turn off ping replies:
sysctl -w net.ipv4.icmp_echo_ignore_all=1
To turn it back on, again use:
sysctl -w net.ipv4.icmp_echo_ignore_all=0
If turning off ping is too severe for you, take a look at the next hack.
#48: Slow down ping rates
- Difficulty: Easy
- Application: sysctl
You may want to keep the ability to reply to pings, but protect yourself from a form of attack known as a 'ping flood'. So how can you manage such a feat? The easiest way is to slow down the rate at which the server replies to pings. They are still valid, but won't overload the server:
sysctl -w net.ipv4.icmp_echoreply_rate=10
This slows the rate at which replies are sent to a single address.
#49: Clean up KDE on logout
- Difficulty: Easy
- Application: bash
On Windows there are plenty of programs that do stuff like clean out your web cache, remove temporary files and all sorts of other stuff when you logout. Wouldn't it be cool to do this on Linux too? With KDE, you don't need to even install any new software, as the startkde script will automatically run scripts you put in special places.
First, you need to create a directory called shutdown in your .kde directory:
mkdir /home/username/.kde/shutdown
Now create a script to do any stuff you like on shutdown. Here is an example:
#!/bin/bash
#clear up temp folder
rm -rf ~/tmp/*
#clear out caches
rm -rf ~/.ee/minis/*
rm -rf ~/.kde/share/cache/http/*
# delete konqueror form completions
rm ~/.kde/share/apps/khtml/formcompletions
Now make sure you set the correct permissions:
chmod ug+x ~/.kde/shutdown/cleanup.sh
(or whatever you called it). As well as cleaning up sensitive files, you can also have global shutdown scripts for all users, by placing the script in your default KDE folder, in a subfolder called shutdown. To find out which is your default KDE directory, try:
kde-config --path exe
#50: Password-less ssh
- Difficulty: Intermediate
- Application: ssh
Tired of typing your password every time you log into the server? ssh also supports keys, so you'll only have to type in your password when you log in to the desktop. Generate a keypair on your desktop machine:
ssh-keygen -t dsa -C your.email@ddress
Enter a passphrase for your key. This puts the secret key in ~/.ssh/id_dsa and the public key in ~/.ssh/id_dsa.pub. Now see whether you have an ssh-agent running at present:
echo $SSH_AGENT_PID
Most window managers will run it automatically if it's installed. If not, start one up:
eval $(ssh-agent)
Now, tell the agent about your key:
ssh-add
and enter your passphrase. You'll need to do this each time you log in; if you're using X, try adding
SSH_ASKPASS=ssh-askpass ssh-add
to your .xsession file. (You may need to install ssh-askpass.) Now for each server you log into, create the directory ~/.ssh and copy the file ~/.ssh/id_dsa.pub into it as ~/.ssh/authorized_keys . If you started the ssh-agent by hand, kill it with
ssh-agent -k
when you log out.
#51: Using rsync over ssh
- Difficulty: Intermediate
- Application: Shell
Keep large directory structures in sync quickly with rsync. While tar over SSH is ideal for making remote copies of parts of a filesystem, rsync is even better suited for keeping the filesystem in sync between two machines. To run an rsync over SSH, pass it the -e switch, like this:
rsync -ave ssh greendome:/home/ftp/pub/ /home/ftp/pub/
Note the trailing / on the file spec from the source side (on greendome.) On the source spec, a trailing / tells rsync to copy the contents of the directory, but not the directory itself. To include the directory as the top level of what's being copied, leave off the /:
rsync -ave ssh bcnu:/home/six .
This will keep a copy of the ~/six/ directory on village in sync with whatever is present on bcnu:/home/six/. By default, rsync will only copy files and directories, but not remove them from the destination copy when they are removed from the source. To keep the copies exact, include the --delete flag:
rsync -ave ssh --delete greendome:~one/reports .
Now when old reports are removed from ~one/reports/ on greendome, they're also removed from ~six/public_html/reports/ on the synced version, every time this command is run. If you run a command like this in cron, leave off the v switch. This will keep the output quiet (unless rsync has a problem running, in which case you'll receive an email with the error output). Using SSH as your transport for rsync traffic has the advantage of encrypting the data over the network and also takes advantage of any trust relationships you already have established using SSH client keys.
#52: Asset scanning
- Difficulty: Intermediate
- Application: nmap
Normally, when people think of using nmap, they assume it's used to conduct some sort of nefarious network reconnaissance in preparation for an attack. But as with all powerful tools, nmap can be made to wear a white hat, as it's useful for far more than breaking into networks. For example, simple TCP connect scans can be conducted without needing root privileges:
nmap rigel
nmap can also scan ranges of IP addresses by specifying the range or using CIDR notation:
nmap 192.168.0.1-254
nmap 192.168.0.0/24
nmap can provide much more information if it is run as root. When run as root, it can use special packets to determine the operating system of the remote machine by using the -O flag. Additionally, you can do half-open TCP scanning by using the -sS flag. When doing a half-open scan, nmap will send a SYN packet to the remote host and wait to receive the ACK from it; if it receives an ACK, it knows that the port is open.
This is different from a normal three-way TCP handshake, where the client will send a SYN packet and then send an ACK back to the server once it has received the initial server ACK. Attackers typically use this option to avoid having their scans logged on the remote machine.
nmap -sS -O rigel
Starting nmap V. 3.00 ( www.insecure.org/nmap/ )
Interesting ports on rigel.nnc (192.168.0.61):
(The 1578 ports scanned but not shown below are in state: filtered)
Port       State       Service
7/tcp      open     echo
9/tcp      open     discard
13/tcp     open     daytime
19/tcp     open     chargen
21/tcp     open     ftp
22/tcp     open     ssh
23/tcp     open     telnet
25/tcp     open     smtp
37/tcp     open     time
79/tcp     open     finger
111/tcp    open     sunrpc
512/tcp    open     exec
513/tcp    open     login
514/tcp    open     shell
587/tcp    open     submission
7100/tcp   open     font-service
32771/tcp  open     sometimes-rpc5
32772/tcp  open     sometimes-rpc7
32773/tcp  open     sometimes-rpc9
32774/tcp  open     sometimes-rpc11
32777/tcp  open     sometimes-rpc17
Remote operating system guess: Solaris 9 Beta through Release on SPARC
Uptime 44.051 days (since Sat Nov  1 16:41:50 2003)
Nmap run completed -- 1 IP address (1 host up) scanned in 166 seconds
With OS detection enabled, nmap has confirmed that the OS is Solaris, but now you also know that it's probably Version 9 running on a SPARC processor.
One powerful feature that can be used to help keep track of your network is nmap's XML output capabilities. This is activated by using the -oX command-line switch, like this:
nmap -sS -O -oX scandata.xml rigel
This is especially useful when scanning a range of IP addresses or your whole network, because you can put all the information gathered from the scan into a single XML file that can be parsed and inserted into a database. Here's what an XML entry for an open port looks like:
nmap is a powerful tool. By using its XML output capabilities, a little bit of scripting, and a database, you can create an even more powerful tool that can monitor your network for unauthorized services and machines.
#53: Backup your bootsector
- Difficulty Expert
- Application Shell
Messing with bootloaders, dual-booting and various other scary processes can leave you with a messed up bootsector. Why not create a backup of it while you can:
dd if=/dev/hda of=bootsector.img bs=512 count=1
Obviously you should change the device to reflect your boot drive (it may be sda for SCSI). Also, be very careful not to get things the wrong way around - you can easily damage your drive! To restore use:
dd if=bootsector.img of=/dev/hda
#54: Protect log files
- Difficulty: Expert
- Application: Various
During an intrusion, an attacker will more than likely leave telltale signs of his actions in various system logs: a valuable audit trail that should be protected. Without reliable logs, it can be very difficult to figure out how the attacker got in, or where the attack came from. This info is crucial in analysing the incident and then responding to it by contacting the appropriate parties involved. But, if the break-in is successful, what's to stop him from removing the traces of his misbehaviour?
This is where file attributes come in to save the day (or at least make it a little better). Both Linux and the BSDs have the ability to assign extra attributes to files and directories. This is different from the standard Unix permissions scheme in that the attributes set on a file apply universally to all users of the system, and they affect file accesses at a much deeper level than file permissions or ACLs.
In Linux, you can see and modify the attributes that are set for a given file by using the lsattr and chattr commands, respectively. At the time of this writing, file attributes in Linux are available only when using the ext2 and ext3 filesystems. There are also kernel patches available for attribute support in XFS and ReiserFS. One useful attribute for protecting log files is append-only. When this attribute is set, the file cannot be deleted, and writes are only allowed to append to the end of the file.
To set the append-only flag under Linux, run this command:
chattr +a filename
See how the +a attribute works: create a file and set its append-only attribute:
touch /var/log/logfile
echo "append-only not set" > /var/log/logfile
chattr +a /var/log/logfile
echo "append-only set" > /var/log/logfile
bash: /var/log/logfile: Operation not permitted
The second write attempt failed, since it would overwrite the file. However, appending to the end of the file is still permitted:
echo "appending to file" >> /var/log/logfile
cat /var/log/logfile
append-only not set
appending to file
Obviously, an intruder who has gained root privileges could realise that file attributes are being used and just remove the append-only flag from our logs by running chattr -a. To prevent this, we need to disable the ability to remove the append-only attribute. To accomplish this under Linux, use its capabilities mechanism.
The Linux capabilities model divides up the privileges given to the all-powerful root account and allows you to selectively disable them. In order to prevent a user from removing the append-only attribute from a file, we need to remove the CAP_LINUX_IMMUTABLE capability. When present in the running system, this capability allows the append-only attribute to be modified. To modify the set of capabilities available to the system, we will use a simple utility called lcap (http://packetstormsecurity.org/linux/admin/lcap-0.0.3.tar.bz2).
To unpack and compile the tool, run this command:
tar xvfj lcap-0.0.3.tar.bz2 && cd lcap-0.0.3 && make
Then, to disallow modification of the append-only flag, run:
./lcap CAP_LINUX_IMMUTABLE
./lcap CAP_SYS_RAWIO
The first command removes the ability to change the append-only flag, and the second removes the ability to do raw I/O. This is needed so that the protected files cannot be modified by accessing the block device they reside on. It also prevents access to /dev/mem and /dev/kmem, which would provide a loophole for an intruder to reinstate the CAP_LINUX_IMMUTABLE capability. To remove these capabilities at boot, add the previous two commands to your system startup scripts (eg /etc/rc.local). You should ensure that capabilities are removed late in the boot order, to prevent problems with other startup scripts. Once lcap has removed kernel capabilities, they can be reinstated only by rebooting the system.
Before doing this, you should be aware that adding append-only flags to your log files will most likely cause log rotation scripts to fail. However, doing this will greatly enhance the security of your audit trail, which will prove invaluable in the event of an incident.
#55: Automatically encrypted connections
- Difficulty: Expert
- Application: FreeS/WAN
One particularly cool feature supported by FreeS/WAN is opportunistic encryption with other hosts running FreeS/WAN. This allows FreeS/WAN to transparently encrypt traffic between all hosts that also support opportunistic encryption. To do this, each host must have a public key generated to use with FreeS/WAN. This key can then be stored in a DNS TXT record for that host. When a host that is set up for opportunistic encryption wishes to initiate an encrypted connection with another host, it will look up the host's public key through DNS and use it to initiate the connection.
To begin, you'll need to generate a key for each host that you want to use this feature with. You can do that by running the following command:
ipsec newhostkey --output /tmp/`hostname`.key
Now you'll need to add the contents of the file that was created by that command to /etc/ipsec.secrets:
cat /tmp/`hostname`.key >> /etc/ipsec.secrets
Next, you'll need to generate a TXT record to put into your DNS zone. You can do this by running a command similar to this one:
ipsec showhostkey --txt @colossus.nnc
Now add this record to your zone and reload it. You can verify that DNS is working correctly by running this command:
ipsec verify
Checking your system to see if IPsec got installed and started correctly
Version check and ipsec on-path  [OK]
Checking for KLIPS support in kernel   [OK]
Checking for RSA private key (/etc/ipsec.secrets)   [OK]
Checking that pluto is running   [OK]
DNS checks.
Looking for TXT in forward map: colossus   [OK]
Does the machine have at least one non-private address   [OK]
Now just restart FreeS/WAN - you should now be able to connect to any other host that supports opportunistic encryption. But what if other hosts want to connect to you? To allow this, you'll need to create a TXT record for your machine in your reverse DNS zone.
You can generate the record by running a command similar to this:
ipsec showhostkey --txt 192.168.0.64
Add this record to the reverse zone for your subnet, and other machines will be able to initiate opportunistic encryption with your machine. With opportunistic encryption in use, all traffic between the hosts will be automatically encrypted, protecting all services simultaneously.
#56: Eliminate suid binaries
- Difficulty: Intermediate
- Application: find
If your server has more shell users than yourself, you should regularly audit the setuid and setgid binaries on your system. Chances are you'll be surprised at just how many you'll find. Here's one command for finding all of the files with a setuid or setgid bit set:
find / -perm +6000 -type f -exec ls -ld {} \; > setuid.txt &
This will create a file called setuid.txt that contains the details of all of the matching files present on your system. To remove the s bits of any tools that you don't use, type:
chmod a-s program
#57: Mac filtering Host AP
- Difficulty: Expert
- Application: iwpriv
While you can certainly perform MAC filtering at the link layer using iptables or ebtables, it is far safer to let Host AP do it for you. This not only blocks traffic that is destined for your network, but also prevents miscreants from even associating with your station. This helps to preclude the possibility that someone could still cause trouble for your other associated wireless clients, even if they don't have further network access.
When using MAC filtering, most people make a list of wireless devices that they wish to allow, and then deny all others. This is done using the iwpriv command.
iwpriv wlan0 addmac 00:30:65:23:17:05
iwpriv wlan0 addmac 00:40:96:aa:99:fd
 ...
iwpriv wlan0 maccmd 1
iwpriv wlan0 maccmd 4
The addmac directive adds a MAC address to the internal table. You can add as many MAC addresses as you like to the table by issuing more addmac commands. You then need to tell Host AP what to do with the table you've built. The maccmd 1 command tells Host AP to use the table as an "allowed" list, and to deny all other MAC addresses from associating. Finally, the maccmd 4 command boots off all associated clients, forcing them to reassociate. This happens automatically for clients listed in the table, but everyone else attempting to associate will be denied.
Sometimes, you only need to ban a troublemaker or two, rather than set an explicit policy of permitted devices. If you need to ban a couple of specific MAC address but allow all others, try this:
iwpriv wlan0 addmac 00:30:65:fa:ca:de
iwpriv wlan0 maccmd 2
iwpriv wlan0 kickmac 00:30:65:fa:ca:de
As before, you can use addmac as many times as you like. The maccmd 2 command sets the policy to "deny," and kickmac boots the specified MAC immediately, if it happens to be associated. This is probably nicer than booting everybody and making them reassociate just to ban one troublemaker. Incidentally, if you'd like to remove MAC filtering altogether, try maccmd 0.
If you make a mistake typing in a MAC address, you can use the delmac command just as you would addmac, and it (predictably) deletes the given MAC address from the table. Should you ever need to flush the current MAC table entirely but keep the current policy, use this command:
iwpriv wlan0 maccmd 3
Finally, you can view the running MAC table by using /proc:
cat /proc/net/hostap/wlan0/ap_control
The iwpriv program manipulates the running Host AP driver, but doesn't preserve settings across reboots. Once you are happy with the contents of your MAC filtering table, be sure to put the relevant commands in an rc script to run at boot time.
Note that even unassociated clients can still listen to network traffic, so MAC filtering actually does very little to prevent eavesdropping. To combat passive listening techniques, you will need to encrypt your data.
More info: http://www.tuxradar.com/content/more-linux-tips-every-geek-should-know
Reference: http://tuxradar.com/content/linux-tips-every-geek-should-know
Subscribe to:
Comments (Atom)
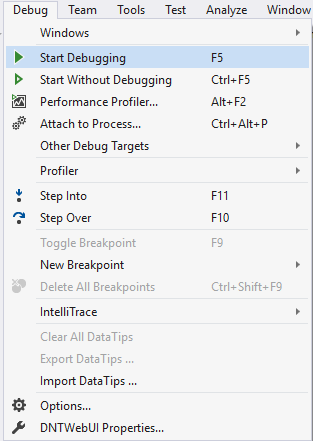
Visual Studio Keyboard Shortcuts
Playing with keyboard shortcuts is very interesting and reduce the headache of using the mouse again and again while programming with visu...
-
Delete: /YOUR PATH TO WORKSPACE/.metadata/.plugins/org.eclipse.core.resources
-
Playing with keyboard shortcuts is very interesting and reduce the headache of using the mouse again and again while programming with visu...
-
Unity NavMesh vs Apex Path vs A* Pathfinding Project Update June 2017: Unity 5.6 comes with improved NavMeshes! They are now component-b...

