Disassemble, repair and upgrade Toshiba laptop yourself. Step by step instructions. Great work!
http://www.irisvista.com/tech/
Dec 19, 2012
Stage3D Blogs and References
http://www.saltgames.com/
http://blog.onebyonedesign.com
http://flashdaily.net/tagged/stage3d
http://blog.onebyonedesign.com
http://flashdaily.net/tagged/stage3d
Stage3D Shader Cheatsheet
A quick reference for working with AGAL, the new shader language for use with Stage3D introduced with Flash Player 11.
Registers:
Each register consists of four components, which are floating point values. These components are accessed by registerName.x, registerName.y, registerName.z, registerName.w. They’re named for dealing with 3D positions – with the ‘w’ for rotation in the style of quaternions – but they can just as well be used to hold a colour (in fact you can also access the components with .r .g. b. a) or any other values you want to use.
There are several registers of each type available. For instance you might have va0 giving the 3D position of a vertex in space, and va1 giving the uv mapping coordinate for that vertex. The nice thing about having registers made up of components is you can do things like perform a basic addition operation va0 and vc0, and the addition will be performed correctly on each component.
Registers for Vertex Shaders
Operations:
Shaders are made up of a series of operations, with one operation on each line. First the operation to perform is identified by a three letter opcode such as “add”, then the parameters for that operation are given. The parameters are (almost) always specified as registers. If you want to use a number in your shader, it should be supplied through the vc or fc registers.
In the parameters the target register is always specified first. The target register is where the result of the operation is placed. No change is made to a register other than the target register. Some operations require two further parameters, others just one. The tex operation used for texture sampling is a special case that has six parameters, three of which are given as strings rather than registers. tex is a pretty wild guy.
At first look the mess of opcodes and registers names that make up the AGAL code for a shader can look intimidating but they’re actually quite simple. Just remember that each operation does exactly one thing, and writes to exactly one register. AGAL doesn’t allow for conditional statements like if then or any form of looping, so following along with what a shader is doing is extremely easy: it always just proceeds to the next operation.
With that said, AGAL code is not nearly as intuitive to glance at and understand what it does as (well written) AS3 code is. Taking a minute to type out some comments for the AGAL code you write is a very good idea.
You are limited to 200 operations in a single AGAL shader.
Registers:
Each register consists of four components, which are floating point values. These components are accessed by registerName.x, registerName.y, registerName.z, registerName.w. They’re named for dealing with 3D positions – with the ‘w’ for rotation in the style of quaternions – but they can just as well be used to hold a colour (in fact you can also access the components with .r .g. b. a) or any other values you want to use.
There are several registers of each type available. For instance you might have va0 giving the 3D position of a vertex in space, and va1 giving the uv mapping coordinate for that vertex. The nice thing about having registers made up of components is you can do things like perform a basic addition operation va0 and vc0, and the addition will be performed correctly on each component.
Registers for Vertex Shaders
- va[0 to 7] Vertex Attribute. The contents of the vertex buffer, as set with context3D.setVertexBufferAt. Each vertex has its own space in the vertex buffer which only it can access.
- vc[0 to 127] Vertex Constant. Passed into the shader with context3D.setProgramConstantsFromVector or context3D.setProgramConstantsFromMatrix. These registers can be read by all vertices, but cannot be written to by the shader.
- vt[0 to 7] Vertex Temporary. A handy temporary register where you can put values during a calculation.
- op Vertex Output or “Output Position”. The output: op.x and op.y is where in the 2D space of the screen this vertex will be drawn. The op.z value is used for depth checking and writing to the depth buffer if you have those enabled. So far as I know the op.w value is not actually used.
- v[0 to 7] Varying. A magical (not actually magical)
register that allows you to pass values from the vertex shader to the
fragment shader. The value that arrives in the fragment shader will be
interpolated between the value of the three v registers of the vertices which make up the triangle in which the fragment falls.
Note! The fragment shader cannot directly access the vertex buffer, so anything it needs from there has to be passed through the v registers. For instance if you’re using texture mapping this register will need to pass the uv coordinates to the fragment shader.
- fc[0 to 27] Fragment Constant. Much like vc for the vertex shader, this register is set by context.setProgramConstantsFromVector or context.setProgramConstantsFromMatrix, can be read by each fragment, and not written to by the shader.
- ft[0 to 7] Fragment Temporary. Again just like vt for the vertex shader, this is a temporary store useful for performing calculations.
- fs[0 to 7] Texture Sampler. This is where the fragment shader is able to access whatever texture(s) were bound using context3D.setTextureAt.
- oc Fragment Output or “Output Colour”. The output: oc.x oc.y oc.z oc.w are the red, green, blue and alpha values respectively for the fragment to be drawn.
Operations:
Shaders are made up of a series of operations, with one operation on each line. First the operation to perform is identified by a three letter opcode such as “add”, then the parameters for that operation are given. The parameters are (almost) always specified as registers. If you want to use a number in your shader, it should be supplied through the vc or fc registers.
In the parameters the target register is always specified first. The target register is where the result of the operation is placed. No change is made to a register other than the target register. Some operations require two further parameters, others just one. The tex operation used for texture sampling is a special case that has six parameters, three of which are given as strings rather than registers. tex is a pretty wild guy.
At first look the mess of opcodes and registers names that make up the AGAL code for a shader can look intimidating but they’re actually quite simple. Just remember that each operation does exactly one thing, and writes to exactly one register. AGAL doesn’t allow for conditional statements like if then or any form of looping, so following along with what a shader is doing is extremely easy: it always just proceeds to the next operation.
With that said, AGAL code is not nearly as intuitive to glance at and understand what it does as (well written) AS3 code is. Taking a minute to type out some comments for the AGAL code you write is a very good idea.
You are limited to 200 operations in a single AGAL shader.
Operations available to shaders:
- mov t a - Copy the contents of a into t.
- add t a b - Add a and b, put result in t.
- sub t a b – Subtract b from a, put result in t.
- mul t a b – Multiple a and b, put result in t.
When working component-wise this operation doesn’t always do as I’d expect. Specifically performing the operation:
mul vt0.xy va0.xy vc0.xy
Gives a different result from performing the two operations:
mul vt0.x va0.x vc0.x
mul vt0.y va0.y vc0.y
Whereas they would give the same result if it were an add operation in both instances instead of mul. I’ve yet to work out exactly what the mul operation does with multiple components. - div t a b – Divide a by b, put result in t.
The same behaviour as outlined above for the mul operation applies to div too. - rcp t a – Divide 1 by a, put result in t.
- min t a b – Copy whichever of a or b is smaller into t.
- max t a b – Copy whichever of a or b is larger into t.
- frc t a – Copy just the fractional part of a into t.
e.g. if a has the value 5.86 then 0.86 is placed in t. - sqt t a - Find the square root of a, put result in t.
- rsq t a – Find 1 divided by the square root of a, put result in t.
- pow t a b – Raise a to the power of b, put result in t.
- log t a – Find the binary logarithm of a, put result in t.
- exp t a – Raise 2 to the power of a, put result in t.
- nrm t a – Normalise the vector given in a (keep same direction, but make it length 1), put result in t.
- sin t a – Find the sine of a, put result in t.
- cos t a – Find the cosine of a, put result in t.
- crs t a b – Find the cross product of the vectors a and b, put result in t.
- dp3 t a b – Find the dot product of the three-dimensional vectors a and b, put result in t.
- dp4 t a b – Find the dot product of the four-dimensional vectors a and b, put result in t.
- abs t a – Find the absolute value of a, put result in t.
- neg t a – Multiply a by -1, put result in t.
- sat t a – Clamp a between 1 and 0, put result in t.
e.g. if a is -4.6, 0 will be placed in t.
If a is 0.6, 0.6 will be placed in t.
If a is 8.2, 1 will be placed in t. - m33 t a b – Perform a 3×3 matrix multiply on a and b, put result in t.
- m44 t a b – Perform a 4×4 matrix multiply on a and b, put result in t.
- m34 t a b – Perform a 3×4 matrix multiply on a and b, put result in t.
- m43 t a b – Perform a 4×3 matrix multiply on a and b, put result in t.
I need to write a decent explanation of what matrix operations do.
In all of these, b is the first register that makes up a matrix. For instance if you perform m44 with b as vc0 then the contents of registers vc0 vc1 vc2 vc3 will be used. a is a single register that gets multiplied through by the matrix specified in b. - sge t a b - If a is greater or equal to b put 1 in t, otherwise put 0 in t.
- slt t a b – If a is less than b put 1 in t, otherwise put 0 in t.
sge and slt are the closest we have to conditional flow control in AGAL so look out for ways to use multiplication of their 1 or 0 result in place of traditional conditionals.
Operations only available to fragment shaders:
- kil a - a must be a single scalar value rather than a vector, for instance: ft0.x. If the value given is less than zero then execution on this fragment is halted and it is not drawn.
- tex t a b
- Samples the texture in b (which should be one of the fs registers) at the coordinates in a, putting the resulting colour in t. - type determines what kind of texture you’re sampling from, and should be either: “2d” for standard texturing or “cube” for using a cubemap.
- wrap determines how to deal with sampling beyond the bounds of the texture, either: “clamp” or “repeat”.
- filter determines how to interpolate between texels, either “mipnearest”, “miplinear” (both of those require mipmaps to have been uploaded for the texture), “nearest”, or “linear”. Use nearest if you want your texture to have crisp pixel edges, use linear if you want them smoothed out.
Dec 12, 2012
Github CHEAT
Setup ----- git cloneclone the repository specified by ; this is similar to "checkout" in some other version control systems such as Subversion and CVS Add colors to your ~/.gitconfig file: [color] ui = auto [color "branch"] current = yellow reverse local = yellow remote = green [color "diff"] meta = yellow bold frag = magenta bold old = red bold new = green bold [color "status"] added = yellow changed = green untracked = cyan Highlight whitespace in diffs [color] ui = true [color "diff"] whitespace = red reverse [core] whitespace=fix,-indent-with-non-tab,trailing-space,cr-at-eol Add aliases to your ~/.gitconfig file: [alias] st = status ci = commit br = branch co = checkout df = diff dc = diff --cached lg = log -p lol = log --graph --decorate --pretty=oneline --abbrev-commit lola = log --graph --decorate --pretty=oneline --abbrev-commit --all ls = ls-files # Show files ignored by git: ign = ls-files -o -i --exclude-standard Configuration ------------- git config -e [--global] edit the .git/config [or ~/.gitconfig] file in your $EDITOR git config --global user.name 'John Doe' git config --global user.email johndoe@example.com sets your name and email for commit messages git config branch.autosetupmerge true tells git-branch and git-checkout to setup new branches so that git-pull(1) will appropriately merge from that remote branch. Recommended. Without this, you will have to add --track to your branch command or manually merge remote tracking branches with "fetch" and then "merge". git config core.autocrlf true This setting tells git to convert the newlines to the system's standard when checking out files, and to LF newlines when committing in git config --list To view all options git config apply.whitespace nowarn To ignore whitespace You can add "--global" after "git config" to any of these commands to make it apply to all git repos (writes to ~/.gitconfig). Info ---- git reflog Use this to recover from *major* mess ups! It's basically a log of the last few actions and you might have luck and find old commits that have been lost by doing a complex merge. git diff show a diff of the changes made since your last commit to diff one file: "git diff -- " to show a diff between staging area and HEAD: `git diff --cached` git status show files added to the staging area, files with changes, and untracked files git log show recent commits, most recent on top. Useful options: --color with color --graph with an ASCII-art commit graph on the left --decorate with branch and tag names on appropriate commits --stat with stats (files changed, insertions, and deletions) -p with full diffs --author=foo only by a certain author --after="MMM DD YYYY" ex. ("Jun 20 2008") only commits after a certain date --before="MMM DD YYYY" only commits that occur before a certain date --merge only the commits involved in the current merge conflicts git log .. show commits between the specified range. Useful for seeing changes from remotes: git log HEAD..origin/master # after git remote update git show show the changeset (diff) of a commit specified by , which can be any SHA1 commit ID, branch name, or tag (shows the last commit (HEAD) by default) also to show the contents of a file at a specific revision, use git show : this is similar to cat-file but much simpler syntax. git show --name-only show only the names of the files that changed, no diff information. git blame show who authored each line in git blame show who authored each line in as of (allows blame to go back in time) git gui blame really nice GUI interface to git blame git whatchanged show only the commits which affected listing the most recent first E.g. view all changes made to a file on a branch: git whatchanged | grep commit | \ colrm 1 7 | xargs -I % git show % this could be combined with git remote show to find all changes on all branches to a particular file. git diff head path/to/fubar show the diff between a file on the current branch and potentially another branch git diff --cached [] shows diff for staged (git-add'ed) files (which includes uncommitted git cherry-pick'ed files) git ls-files list all files in the index and under version control. git ls-remote[HEAD] show the current version on the remote repo. This can be used to check whether a local is required by comparing the local head revision. Adding / Deleting ----------------- git addadd ... , , etc... to the project git add add all files under directory to the project, including subdirectories git add . add all files under the current directory to the project *WARNING*: including untracked files. git rm remove ... , , etc... from the project git rm $(git ls-files --deleted) remove all deleted files from the project git rm --cached commits absence of ... , , etc... from the project Ignoring --------- Option 1: Edit $GIT_DIR/.git/info/exclude. See Environment Variables below for explanation on $GIT_DIR. Option 2: Add a file .gitignore to the root of your project. This file will be checked in. Either way you need to add patterns to exclude to these files. Staging ------- git add add changes in ... git stage ... , ... to the staging area (to be included in the next commit git add -p git stage --patch interactively walk through the current changes (hunks) in the working tree, and decide which changes to add to the staging area. git add -i git stage --interactive interactively add files/changes to the staging area. For a simpler mode (no menu), try `git add --patch` (above) Unstaging --------- git reset HEAD remove the specified files from the next commit Committing ---------- git commit ... commit ... [-m ] , , etc..., optionally using commit message , otherwise opening your editor to let you type a commit message git commit -a commit all files changed since your last commit (does not include new (untracked) files) git commit -v commit verbosely, i.e. includes the diff of the contents being committed in the commit message screen git commit --amend edit the commit message of the most recent commit git commit --amend redo previous commit, including changes made to ... , , etc... Branching --------- git branch list all local branches git branch -r list all remote branches git branch -a list all local and remote branches git branch create a new branch named , referencing the same point in history as the current branch git branch create a new branch named , referencing , which may be specified any way you like, including using a branch name or a tag name git push create a new remote branch named :refs/heads/ , referencing on the remote. Repo is the name of the remote. Example: git push origin origin:refs/heads/branch-1 Example: git push origin origin/branch-1:refs/heads/branch-2 Example: git push origin branch-1 ## shortcut git branch --track create a tracking branch. Will push/pull changes to/from another repository. Example: git branch --track experimental origin/experimental git branch --set-upstream (As of Git 1.7.0) Make an existing branch track a remote branch Example: git branch --set-upstream foo origin/foo git branch -d delete the branch ; if the branch you are deleting points to a commit which is not reachable from the current branch, this command will fail with a warning. git branch -r -d delete a remote-tracking branch. Example: git branch -r -d wycats/master git branch -D even if the branch points to a commit not reachable from the current branch, you may know that that commit is still reachable from some other branch or tag. In that case it is safe to use this command to force git to delete the branch. git checkout make the current branch , updating the working directory to reflect the version referenced by git checkout -b create a new branch referencing , and check it out. git push : removes a branch from a remote repository. Example: git push origin :old_branch_to_be_deleted git coCheckout a file from another branch and add it to this branch. File will still need to be added to the git branch, but it's present. Eg. git co remote_at_origin__tick702_antifraud_blocking ..../...nt_elements_for_iframe_blocked_page.rb git show -- Eg. git show remote_tick702 -- path/to/fubar.txt show the contents of a file that was created on another branch and that does not exist on the current branch. git show : Show the contents of a file at the specific revision. Note: path has to be absolute within the repo. Merging ------- git mergemerge branch into the current branch; this command is idempotent and can be run as many times as needed to keep the current branch up-to-date with changes in git merge --no-commit merge branchinto the current branch, but do not autocommit the result; allows you to make further tweaks git merge -s ours merge branchinto the current branch, but drops any changes in , using the current tree as the new tree Cherry-Picking -------------- git cherry-pick [--edit] [-n] [-m parent-number] [-s] [-x] selectively merge a single commit from another local branch Example: git cherry-pick 7300a6130d9447e18a931e898b64eefedea19544 git hash-object get the blob of some file whether it is in a repository or not Find the commit in the repository that contains the file blob: obj_blob="$1" git log --pretty=format:'%T %h %s' \ | while read tree commit subject ; do if git ls-tree -r $tree | grep -q "$obj_blob" ; then echo $commit "$subject" fi done Squashing --------- WARNING: "git rebase" changes history. Be careful. Google it. git rebase --interactive HEAD~10 (then change all but the first "pick" to "squash") squash the last 10 commits into one big commit Conflicts --------- git mergetool work through conflicted files by opening them in your mergetool (opendiff, kdiff3, etc.) and choosing left/right chunks. The merged result is staged for commit. For binary files or if mergetool won't do, resolve the conflict(s) manually and then do: git add [ Once all conflicts are resolved and staged, commit the pending merge with: git commit Sharing ------- git fetch...] update the remote-tracking branches for (defaults to "origin"). Does not initiate a merge into the current branch (see "git pull" below). git pull fetch changes from the server, and merge them into the current branch. Note: .git/config must have a [branch "some_name"] section for the current branch, to know which remote-tracking branch to merge into the current branch. Git 1.5.3 and above adds this automatically. git push update the server with your commits across all branches that are *COMMON* between your local copy and the server. Local branches that were never pushed to the server in the first place are not shared. git push origin update the server with your commits made to since your last push. This is always *required* for new branches that you wish to share. After the first explicit push, "git push" by itself is sufficient. git push origin :refs/heads/ E.g. git push origin twitter-experiment:refs/heads/twitter-experiment Which, in fact, is the same as git push origin but a little more obvious what is happening. Reverting --------- git revert reverse commit specified by and commit the result. This does *not* do the same thing as similarly named commands in other VCS's such as "svn revert" or "bzr revert", see below git checkout re-checkout , overwriting any local changes git checkout . re-checkout all files, overwriting any local changes. This is most similar to "svn revert" if you're used to Subversion commands Fix mistakes / Undo ------------------- git reset --hard abandon everything since your last commit; this command can be DANGEROUS. If merging has resulted in conflicts and you'd like to just forget about the merge, this command will do that. git reset --hard ORIG_HEAD or git reset --hard origin/master undo your most recent *successful* merge *and* any changes that occurred after. Useful for forgetting about the merge you just did. If there are conflicts (the merge was not successful), use "git reset --hard" (above) instead. git reset --soft HEAD^ forgot something in your last commit? That's easy to fix. Undo your last commit, but keep the changes in the staging area for editing. git commit --amend redo previous commit, including changes you've staged in the meantime. Also used to edit commit message of previous commit. Plumbing -------- test = $(git merge-base ) determine if merging sha1-B into sha1-A is achievable as a fast forward; non-zero exit status is false. Stashing -------- git stash git stash save save your local modifications to a new stash (so you can for example "git svn rebase" or "git pull") git stash apply restore the changes recorded in the stash on top of the current working tree state git stash pop restore the changes from the most recent stash, and remove it from the stack of stashed changes git stash list list all current stashes git stash show -p show the contents of a stash - accepts all diff args git stash drop [ ] delete the stash git stash clear delete all current stashes Remotes ------- git remote add adds a remote repository to your git config. Can be then fetched locally. Example: git remote add coreteam git://github.com/wycats/merb-plugins.git git fetch coreteam git push :refs/heads/ delete a branch in a remote repository git push :refs/heads/ create a branch on a remote repository Example: git push origin origin:refs/heads/new_feature_name git push + : replace a branch with think twice before do this Example: git push origin +master:my_branch git remote prune prune deleted remote-tracking branches from "git branch -r" listing git remote add -t master -m master origin git://example.com/git.git/ add a remote and track its master git remote show show information about the remote server. git checkout -b / Eg.: git checkout -b myfeature origin/myfeature git checkout -b myfeature remotes/ / Track a remote branch as a local branch. It seems that somtimes an extra 'remotes/' is required, to see the exact branch name, 'git branch -a'. git pull git push For branches that are remotely tracked (via git push) but that complain about non-fast forward commits when doing a git push. The pull synchronizes local and remote, and if all goes well, the result is pushable. git fetch Retrieves all branches from the remote repository. After this 'git branch --track ...' can be used to track a branch from the new remote. Submodules ---------- git submodule add add the given repository at the given path. The addition will be part of the next commit. git submodule update [--init] Update the registered submodules (clone missing submodules, and checkout the commit specified by the super-repo). --init is needed the first time. git submodule foreach Executes the given command within each checked out submodule. Removing submodules 1. Delete the relevant line from the .gitmodules file. 2. Delete the relevant section from .git/config. 3. Run git rm --cached path_to_submodule (no trailing slash). 4. Commit and delete the now untracked submodule files. Updating submodules To update a submodule to a new commit: 1. update submodule: cd git pull 2. commit the new version of submodule: cd git commit -m "update submodule version" 3. check that the submodule has the correct version git submodule status If the update in the submodule is not committed in the main repository, it is lost and doing git submodule update will revert to the previous version. Patches ------- git format-patch HEAD^ Generate the last commit as a patch that can be applied on another clone (or branch) using 'git am'. Format patch can also generate a patch for all commits using 'git format-patch HEAD^ HEAD' All page files will be enumerated with a prefix, e.g. 0001 is the first patch. git format-patch ^.. Generate a patch for a single commit. E.g. git format-patch d8efce43099^..d8efce43099 Revision does not need to be fully specified. git am Applies the patch file generated by format-patch. git diff --no-prefix > patchfile Generates a patch file that can be applied using patch: patch -p0 < patchfile Useful for sharing changes without generating a git commit. Tags ---- git tag -l Will list all tags defined in the repository. git co Will checkout the code for a particular tag. After this you'll probably want to do: 'git co -b ' to define a branch. Any changes you now make can be committed to that branch and later merged. Archive ------- git archive master | tar -x -C /somewhere/else Will export expanded tree as tar archive at given path git archive master | bzip2 > source-tree.tar.bz2 Will export archive as bz2 git archive --format zip --output /full/path master Will export as zip Git Instaweb ------------ git instaweb --httpd=webrick [--start | --stop | --restart] Environment Variables --------------------- GIT_AUTHOR_NAME, GIT_COMMITTER_NAME Your full name to be recorded in any newly created commits. Overrides user.name in .git/config GIT_AUTHOR_EMAIL, GIT_COMMITTER_EMAIL Your email address to be recorded in any newly created commits. Overrides user.email in .git/config GIT_DIR Location of the repository to use (for out of working directory repositories) GIT_WORKING_TREE Location of the Working Directory - use with GIT_DIR to specifiy the working directory root or to work without being in the working directory at all. Changing history ---------------- Change author for all commits with given name git filter-branch --commit-filter ' if [ "$GIT_COMMITTER_NAME" = " " ]; then GIT_COMMITTER_NAME=" "; GIT_AUTHOR_NAME=" "; GIT_COMMITTER_EMAIL=" "; GIT_AUTHOR_EMAIL=" "; git commit-tree "$@"; else git commit-tree "$@"; fi' HEAD
GITHUB COMMANDS
git status - view the status of your files in the working directory and staging area
$ git status -s
git diff - shows diff of what is staged and what is modified but unstaged
$ git diff
git commit - records a snapshot of the staging area
$ git config
git rm - remove files from the staging area
git log - show commit history of a branch
git push - push your new branches and data to a remote repository
$ git push github master
// git add . (add all files)
// git commit -m "message"
// git push origin master
Nov 29, 2012
20 Tips To Optimize Your Actionscript
This article was written several years ago for Experts Exchange, and
has proven to be a little more controversial than I expected or
intended, mostly due to the (admittedly vague) reference to what I call
AS3′s “fake” lazy evaluation, which happened to be (rather randomly)
listed as the first tip. I’m removing that tip from the list, not only
because it’s likely confusing, or that the performance gains realized by
following it would be minimal at best, but also because it might be a
safe assumption that future version of the player might correct it.
First, a quick word about the issue itself.
AS3 (and many languages) use “lazy” evaluation. That’s to say that a boolean expression will stop evaluating as soon as it can. Take the following expression:
That means that the second condition (c > d) won’t ever be examined at all, if a is greater than b. This is usually not terribly noticeable, since it’s not obvious if the second component was evaluated. To increase visibility, we can use a function that traces output to the console, as well as returning an value to be evaluated.
You’ll notice that it only traces once. Since it return true the first time, the second invocation never happened. This is where things get sticky. For the most part, AS3 behaves lazily. If you were to create a very slow function (e.g., perform 100000 string concatenations), and put it in a conditional where it should never be evaluated, you’ll see that it’s not.
The above would behave as expected – lets say veryHeavyFunction
normally takes 10ms to execute – even in a loop of 10,000 iterations,
you’ll still get back a very low number.
However…
If it was truly lazy, then this:
Should evaluate just as fast as this:
Both should stop evaluating as soon as the first “true” is encountered, and in fact it in most respects it appears to. But that’s where the waters muddy… For very large iteration sets, the former runs about 7 times slower than the latter in the tests I ran on my personal machine several years ago. Why is this? No idea. This concept seemed to irritate a lot of people. It irritates me. But that’s what happened (in my own empyrical testing, anyway)
On to the article…
Introduction
This article is primarily concerned with ActionScript 3 and generally specific to AVM2. Most suggestions would apply to ActionScript 2 as well, and I’ve noted those tips that differ between AS2 and AS3.
With the advent of ActionScript 3.0 (hereafter “AS3″), the Flash Player realized significant performance gains. A few years ago, I ran some performance tests comparing JavaScript to AS2. ActionScript was noticably slower in every benchmark, usually in the range of 300% or more time required to perform large calculations. Even animation – Flash’s wheelhouse – was slower. AVM2 and AS3 have changed that, and levelled the playing field to a large degree.
That said, the greatest single contributor to slow performance of Flash applications is poorly written ActionScript. Below you’ll find 20 tips to help you write faster applications. Please note that the motivation behind each tip is performance, not transparency or best practice. A performance optimization might directly oppose a best practice, and will very often create opacity in your code. It’s your decision as to what takes priority in your application: performance, transparency or best practices.
Much of the information presented here will provide only negligible gains as regards performance when used in small-scale code operations. However, when a developer tweens 3500 raindrops every frame, every line of code needs to be parsed and pared to the sharpest, smallest point possible.
Before I begin, learn to benchmark your code. There are many approaches, including specialized software or components like frame-rate meters, but the simplest trick I know is to measure the time a loop containing the statements to be tested takes to operate. After all other setup is performed, on the line immediately before the loop, call the getTimer method and store it in a variable. Execute your loop (I usually start with 1000 iterations to avoid script timeout, then increase by a factor of 10 until I get a measurable metric). Immediately following the loop, evaulate the difference by invoking getTimer again and subtracting it from the first. E.g.,
The Tips
1: Recycle Display Objects
Instantiating a Display Object can be a relatively heavy lift, especially for dynamic classes like MovieClip. When possible, instead of creating new DisplayObjects, recylce them and update visual properties and behavior. My post on using the Factory pattern for Display objects is a good example of this
2: Object literals are faster than the new operator
Strings, Numbers (including int and uint), and Boolean objects are usually instantiated using literal notation (var str:String = “text”). Objects and Arrays are often instantiated using the “new” operator – this is seldom necessary (only in the case of a fixed-length Array), and is slower..
3: For loops are faster than while and do-while loops
In AS3, the fastest loop is the for loop (not for.. or for each..in). While and do-while are slightly slower. Note that this is a marked contrast to both ActionScript 2 and JavaScript, where while and do-while are about 3 times faster than for loops. Also, the int datatype is faster than uint or Number (see tip #16).
is faster than
is faster than
5: The one-dot rule
When accessing nested variables, anytime a variable requires even one level of scope shift to discover, and is referenced more than once, save it to local variable. In drawing classes, you’ll often see Math.PI / 2 referenced within loops that might iterated hundreds of times each frame – that value should be stored in a local variable. Note that this is not true when referencing member methods. Saving Math.PI to a variable is appropriate; saving Math.round to a variable is not.
is faster than
9: Use plain text instead of XML where possible
XML requires the VM to implement a parser, where evaluating plain text requires no special operation. Where possible, use strings or plain text rather than XML.
10: Work from the top of the stack
When manipulating arrays, work is performed from the top-down. That means always work from the end of the array, rather than the beginning. Pop and push are faster than shift and unshift.
is faster than
12: Use local variables
When flash detects a variable, it looks first at the local scope – the context of the currently evaluating function. If not found, it looks at the next “highest” scope, and repeats, until the variable is discovered (or undefined is returned). Always use local variables when possible. Note that function arguments are considered local variables.
is faster than
13: Constants are faster than variables
Update 10/27/12 – if this was ever true, it no longer is.
14: Use the as operator instead of casting
Use the “as” operator when possible, instead of casting via constructor.
is faster than
20: Stay DRY
The concept of DRY (Don’t Repeat Yourself) is commonly known and accepted, but in addition to more obivous benefits like maintainability and transparency, it can be a huge peformance boon. Whenever possible, perform an action as few times as possible. If several elements need to slide to the right, try to put them in a common parent and animate that rather than each instance. If there’s a method used frequently that isn’t dependant on instance state, use a static method. A very good example of this is filters – if you apply a GlowFilter on dozens of particles in an animation, performance will suffer – try putting the GlowFilter on a common parent and append each particle to that parent.
AS3 (and many languages) use “lazy” evaluation. That’s to say that a boolean expression will stop evaluating as soon as it can. Take the following expression:
1
if ( a > b || c > d)That means that the second condition (c > d) won’t ever be examined at all, if a is greater than b. This is usually not terribly noticeable, since it’s not obvious if the second component was evaluated. To increase visibility, we can use a function that traces output to the console, as well as returning an value to be evaluated.
1
function isTrue(){
2
trace('isTrue is evaluated');
3
return true;
4
}
5
if(isTrue() || isTrue()) {};You’ll notice that it only traces once. Since it return true the first time, the second invocation never happened. This is where things get sticky. For the most part, AS3 behaves lazily. If you were to create a very slow function (e.g., perform 100000 string concatenations), and put it in a conditional where it should never be evaluated, you’ll see that it’s not.
1 if(true || veryHeavyFunction())However…
If it was truly lazy, then this:
1
if(false || true || true || true || true || true || true || true || true || true || true || true)Should evaluate just as fast as this:
1
if(false || true)Both should stop evaluating as soon as the first “true” is encountered, and in fact it in most respects it appears to. But that’s where the waters muddy… For very large iteration sets, the former runs about 7 times slower than the latter in the tests I ran on my personal machine several years ago. Why is this? No idea. This concept seemed to irritate a lot of people. It irritates me. But that’s what happened (in my own empyrical testing, anyway)
On to the article…
Introduction
This article is primarily concerned with ActionScript 3 and generally specific to AVM2. Most suggestions would apply to ActionScript 2 as well, and I’ve noted those tips that differ between AS2 and AS3.
With the advent of ActionScript 3.0 (hereafter “AS3″), the Flash Player realized significant performance gains. A few years ago, I ran some performance tests comparing JavaScript to AS2. ActionScript was noticably slower in every benchmark, usually in the range of 300% or more time required to perform large calculations. Even animation – Flash’s wheelhouse – was slower. AVM2 and AS3 have changed that, and levelled the playing field to a large degree.
That said, the greatest single contributor to slow performance of Flash applications is poorly written ActionScript. Below you’ll find 20 tips to help you write faster applications. Please note that the motivation behind each tip is performance, not transparency or best practice. A performance optimization might directly oppose a best practice, and will very often create opacity in your code. It’s your decision as to what takes priority in your application: performance, transparency or best practices.
Much of the information presented here will provide only negligible gains as regards performance when used in small-scale code operations. However, when a developer tweens 3500 raindrops every frame, every line of code needs to be parsed and pared to the sharpest, smallest point possible.
Before I begin, learn to benchmark your code. There are many approaches, including specialized software or components like frame-rate meters, but the simplest trick I know is to measure the time a loop containing the statements to be tested takes to operate. After all other setup is performed, on the line immediately before the loop, call the getTimer method and store it in a variable. Execute your loop (I usually start with 1000 iterations to avoid script timeout, then increase by a factor of 10 until I get a measurable metric). Immediately following the loop, evaulate the difference by invoking getTimer again and subtracting it from the first. E.g.,
1
var start:Number = getTimer();
2
for(var i:int = 0; i < 1000; i++){
3
// statements to evaluate
4
}
5
trace(getTimer() - start);
The Tips
1: Recycle Display Objects
Instantiating a Display Object can be a relatively heavy lift, especially for dynamic classes like MovieClip. When possible, instead of creating new DisplayObjects, recylce them and update visual properties and behavior. My post on using the Factory pattern for Display objects is a good example of this
2: Object literals are faster than the new operator
Strings, Numbers (including int and uint), and Boolean objects are usually instantiated using literal notation (var str:String = “text”). Objects and Arrays are often instantiated using the “new” operator – this is seldom necessary (only in the case of a fixed-length Array), and is slower..
1
var list:Array = [1,2,3];is faster than
1
var list:Array = new Array(1,2,3); 3: For loops are faster than while and do-while loops
In AS3, the fastest loop is the for loop (not for.. or for each..in). While and do-while are slightly slower. Note that this is a marked contrast to both ActionScript 2 and JavaScript, where while and do-while are about 3 times faster than for loops. Also, the int datatype is faster than uint or Number (see tip #16).
1
for(var i:int=0;i<1000;i++)is faster than
1
var i:int=0;
2
while(i<1000)
4: The in operator is faster than hasOwnProperty
To test if an object has a publically available property, use the “in” operator instead of the hasOwnProperty method.
To test if an object has a publically available property, use the “in” operator instead of the hasOwnProperty method.
1
prop in Objectis faster than
1
Object.hasOwnProperty("prop")5: The one-dot rule
When accessing nested variables, anytime a variable requires even one level of scope shift to discover, and is referenced more than once, save it to local variable. In drawing classes, you’ll often see Math.PI / 2 referenced within loops that might iterated hundreds of times each frame – that value should be stored in a local variable. Note that this is not true when referencing member methods. Saving Math.PI to a variable is appropriate; saving Math.round to a variable is not.
1
var var1:Number = container.child.x;
2
textfield.text = var1;
3
container.child2.x = var1; is faster than
1
textfield.text = container.child.x;
2
container.child2.x = container.child.x;
6: Dynamic classes are slow – use a public object variable instead
Avoid dynamic classes. Consider a public variable datatyped to Object instead. In a simple test, I extended Sprite and added a public data:* property, which could be used to store any type of dynamic information (attached to the data property rather than the instance itself). Running it over a few hundred thousand iterations, the extended Sprite was about 25% faster.
Avoid dynamic classes. Consider a public variable datatyped to Object instead. In a simple test, I extended Sprite and added a public data:* property, which could be used to store any type of dynamic information (attached to the data property rather than the instance itself). Running it over a few hundred thousand iterations, the extended Sprite was about 25% faster.
1
public class MyObject{
2
public var variables:Object = {};
3
}
is faster than
1
public dynamic class MyObject{
2
}
7: Perform work in enterframes
This one may seem counter-intuitive, and most tutorials and help-boards are peppered with warning against enter frames. Surprisingly, performing heavy calculation during the enterframe can help “balance the load” and lead to improved performance.
8: Standard string methods are faster than Regular Expressions
Regular Expressions are a great tool and can make complex tasks much easier. However, standard string methods are almost always faster.
1
someString.replace("abc", "");is faster than
1
someString.replace(/abc/, "");9: Use plain text instead of XML where possible
XML requires the VM to implement a parser, where evaluating plain text requires no special operation. Where possible, use strings or plain text rather than XML.
10: Work from the top of the stack
When manipulating arrays, work is performed from the top-down. That means always work from the end of the array, rather than the beginning. Pop and push are faster than shift and unshift.
1
MyArray.push(myVar);is faster than
1
myTimer.addEventListener(TimerEvent.Timer, myFunc, false, 0, true);12: Use local variables
When flash detects a variable, it looks first at the local scope – the context of the currently evaluating function. If not found, it looks at the next “highest” scope, and repeats, until the variable is discovered (or undefined is returned). Always use local variables when possible. Note that function arguments are considered local variables.
1
function getMinutes(){
2
var myVar:uint = 6000;
3
return getTimer() / myVar;
4
}is faster than
1
var myVar:uint = 6000;
2
function getMinutes(){
3
return getTimer() / myVar;
4
}
Update 10/27/12 – if this was ever true, it no longer is.
14: Use the as operator instead of casting
Use the “as” operator when possible, instead of casting via constructor.
1
var child:MyClass = event.currentTarget as MyClass; is faster than
1
var child:MyClass = MyClass(event.currentTarget); 15: E4X is extremely slow
E4X is another great tool that can offer drastic savings in development
time, but when used on large data sets its performance tends to suffer.
Surprisingly, looping through an XML tree is often much faster than
complicated E4X structures.
1
for each(var node:XML in myXML){
2
if(node.@myProp == "value"){
3
if(node.@anotherProp == 12){
4
react();
5
}
6
}
7
}
is faster than
1
var nodes:XMLList = myXML.(@myProp=="value").(@anotherProp==12);
2
for each(var node:XML in nodes){
3
react();
4
}
16: int – uint – Number
Use the appropriate number datatype. For simple incrementation (e.g., a for loop), ff the three Number datatypes, Number is the slowest, int is the fastest, and uint is slightly slower than int. If you’re dividing, use Number.
Use the appropriate number datatype. For simple incrementation (e.g., a for loop), ff the three Number datatypes, Number is the slowest, int is the fastest, and uint is slightly slower than int. If you’re dividing, use Number.
17: Use bitwise methods when possible

Figuring out the math behind bitwise operation can be intimidating, but
there are simple ways to use bitwise functionality that can really speed
 up your code.
1
var n:Number = 9374.230498;
2
var m:Number = n | 0;
is faster than
1
var n:Number = 9374.230498;
2
var m:Number = Math.foor(n);
18: Use array.join instead of string concatenation
String concatenation is very slow – use arrays and array methods where possible.
String concatenation is very slow – use arrays and array methods where possible.
1
var myArray:Array = [];
2
for(var i:int=0;i<1000;i++){
3
myArray[i] = "text";
4
};
5
var myString:String = myArray.join(" ");
is faster than
1
var myString:String = "";
2
for(var i:int=0;i<1000;i++){
3
myString += "text ";
4
};
19: Don’t evaluate in a loop’s conditional test
The condition expression in the for loop is commonly used to evaluate a variable or property – this expression should be a predefined local variable when possible, so that it doesn’t need to be evaluated during each iteration of the loop.
The condition expression in the for loop is commonly used to evaluate a variable or property – this expression should be a predefined local variable when possible, so that it doesn’t need to be evaluated during each iteration of the loop.
1
var l:uint = myArray.length;
2
for(var i:int=0;i>l;i++)is faster than
1
for(var i:int=0;i>myArray.length;i++) 20: Stay DRY
The concept of DRY (Don’t Repeat Yourself) is commonly known and accepted, but in addition to more obivous benefits like maintainability and transparency, it can be a huge peformance boon. Whenever possible, perform an action as few times as possible. If several elements need to slide to the right, try to put them in a common parent and animate that rather than each instance. If there’s a method used frequently that isn’t dependant on instance state, use a static method. A very good example of this is filters – if you apply a GlowFilter on dozens of particles in an animation, performance will suffer – try putting the GlowFilter on a common parent and append each particle to that parent.
Conclusion
I hope the tips I’ve included can help you avoid some less-than-obvious pitfalls on the road to optimization.
I’ve tried to include information here that isn’t found in other AS3 optimization white papers, and tried to keep the superflous information to a minimum.
Additionally, there are optimization techniques found elsewhere that I question. For example, in AS3, variable name length doesn’t matter (it did in AS2).
1
var a:Number = 987234.230948; is NOT faster than
1
var myLongVariableNameUsedToMatterButDoesntAnymore:Number = 987234.230948; I’ve also seen developers discourage typing inside a loop, stating that
variables that will be referenced within the loop should be typed
outside of it. My own testing does not prove that out.
1
var n:Number;
2
for(var i:int=0;i>10000;i++){
3
n = Math.random();
4
}
is NOT faster than
1
for(var i:int=0;i>10000;i++){
2
var n:Number = Math.random();
3
}
Last, a warning: don’t try to optimize your code until it’s thoroughly
debugged.  Make sure everything is working exactly as it should, even
under challenging conditions, before worrying about performance.
May 3, 2012
the user does not have sufficient privileges to install Adobe Flash Player (Windows XPXP)
ERROR While installing Flash Player:
the user does not have sufficient privileges to install Adobe Flash Player
1- First uninstall Flash Player with this tool: http://helpx.adobe.com/flash-player/kb/uninstall-flash-player-windows.html
2- Then install the latest flash release with your administrator account : http://www.adobe.com/support/flashplayer/downloads.html
more info about Flash Player 11 (Stage3D, molehill etc.): http://www.adobe.com/tr/products/flashplayer.html
Apr 20, 2012
Why Linux?
Microsoft has reached an enormous success with its Windows product during the last decade and practically monopolized the market for home computer operating systems. But, does it mean Windows is still the best OS around, especially for power users?No, it’s not. At least not always. And on this page you are going to see why.
Summary
If we draw a comparison between the two operating systems considering licensing, selling, and upgrading models, and if we add the supreme configurability (resulting from the system’s philosophy), and a low pricing then it will appear the GNU/Linux is decidedly more user friendly in terms of software then any other system existing on the market at present (perhaps apart from niche systems like GNU/Hurd and Haiku).
Microsoft Windows systems are still dug in on the other pole with their restricted licensing allowing users to — at the most — conditionally run the systems (not even in every case) and their applications.
By friendliness we mean something more general that the ease-of-use and availability of applications! It is about not constraining the users but granting them full freedom to exert their rights to use software in their own way. It is about a freedom of choice — the possibility to use any window manager, any file system, and any package system the user wants to choose, about the possibility to work in a console or GUI environment, locally or remotely. It’s all about the security schema, well designed and overt, instead of “security by obscurity” model which has been compromised over and over. Do the users need such freedom? Certainly 90% PC users will do well without it. For the remaining 10%, including me, the GNU/Linux systems have appeared to be the only solution.
Why Linux? Why do most web hosting companies use Linux as their primary platform for their servers? The answer is simple: security, stabilty and speed!
Read 10 reasons to choose Linux
- Security — why are the default security settings of Windows XP so bad?
- Desktop usability — what is wrong with Windows’ usability and how it is corrected in GNU/Linux desktops?
- Installing software — ok, you thought it can’t be easier than double-clicking the
setup.exefile? Think again! - Upgrading — ever thought that upgrading your system and all its appliactions could be as executing one single command? No? Well, GNU/Linux is exactly this way.
- System crashes — every desktop crashes, but how to get over it?
- Performance — is Linux really that much faster than Windows? Well… it is.
- The power of console — learn how to improve your productivity by using the terminal
- Remote access in GNU/Linux — how to connect remotely to your Linux box
- Philosophy and licencing of Linux — how does it differ from the proprietary software?
- Cost and TCO of Linux — what is cheaper — Linux or Windows?
Reference: http://polishlinux.org/why-linux/
The Linux Command Line - Review
 was given an opportunity to review The Linux Command Line, a Complete Introduction, by William E. Shotts, JR from No Starch Press
and decided to give it a go. Being somewhat of a command line geek, I’m
always on the lookout for good material to learn new and interesting
things, and perhaps recommend to others. This is one of the better books
I’ve read on the Linux Command line. It is easy to read and users with a
little experience will find it has straight forward descriptions and
examples. The book contains a lot of information and the only thing I’ve
found lacking is diagrams, but if you’re not a particularly visual
learner, this may work for you.
was given an opportunity to review The Linux Command Line, a Complete Introduction, by William E. Shotts, JR from No Starch Press
and decided to give it a go. Being somewhat of a command line geek, I’m
always on the lookout for good material to learn new and interesting
things, and perhaps recommend to others. This is one of the better books
I’ve read on the Linux Command line. It is easy to read and users with a
little experience will find it has straight forward descriptions and
examples. The book contains a lot of information and the only thing I’ve
found lacking is diagrams, but if you’re not a particularly visual
learner, this may work for you.If you’re new to the Linux command line you’ll walk away knowing what it is capable of; how to do all kinds of stuff that the “experts” do on a daily basis and probably more. For example, I can’t remember the last time I printed something from the shell. There is so much information contained within this book, you’re almost guaranteed to learn something, I did.
Welcome to Yogurtistan!
A 3D shopping universe inside Facebook | VentureBeat:
check this out :http://venturebeat.com/2012/04/19/welcome-to-yogurtistan-a-3d-shopping-universe-inside-facebook/#s:yogurtistan-0018

Yogurtistan is a 3D world aimed at simulating real-world retail environments for e-commerce companies on Facebook. With this technology, retailers can create 3D environments where customers can make custom avatars, try on virtual clothing, interact with one another online, and make purchases.
It’s built on Adobe’s Flash player version 11.2, and is accessible to users on Windows PCs, Macs, and tablets (via an Air 3.2 app). It’s also integrated into Facebook.
“We are creating a new experience by mimicking real-life engagement by going from store to store without changing a tab, or entering the web site address of the store,” said Yogurt AS chief executive Cemil Turun (pictured below), in a press release. “This is one centralized system. I can run into a promotion, a friend, or simply begin to chat with a stranger in the street, all of which is accessible on any browser or even an iPad.”
Yogurt presented its new 3D world today at the DEMO Spring 2012 conference in Santa Clara, Calif.
Currently, Yogurtistan is a small, retail-focused universe with just one plaza. On that plaza are several stores, including Migros, which is Turkey’s largest supermarket chain, and Quiksilver, a global clothing brand for surf, snow, and skate enthusiasts. Other Turkish and international brands building presences in Yogurtistan include TheFirstClub (an online games, books and music site, based in London), BiggShop, Aral, Oxxo, iddaa (online betting) , Tefal (a French kitchenware brand), Swissotel, Yummy Cupcakes, Magic Form, Fenerium, Intema, and Babylon Jazz Club.
To set up shop in the universe, retailers first need to create a storefront, using industry-standard 3D editing tools, such as 3D Max, Softimage XSI, AutoCad, or Maya. Yogurt AS provides guidance about how many polygons the files should use and the kinds of texture files needed. Once the retailer delivers a 3D file to Yogurt AS, the company converts it and annexes it to Yogurtistan, then delivers an Adobe Flash file (.SWF) that the retailer can embed in a website or Facebook page.
There’s no upfront fee for the service, but Yogurt AS charges a percentage of the transactions made in Yogurtistan. The amount varies, but currently runs about 10-to-15 percent for apparel retailers. Yogurt also provides CRM tools for engaging customers.
As a bonus, real-world apparel brands can cash in on the craze for virtual goods, because they can sell virtual clothing for customers avatars within Yogurtistan.
An additional attraction, Cemil said, is that “It is very cool to have a virtual 3D store.”
Cemil started out as a programmer and 3D animator in the 1990s, then founded Yogurt technologies in 1997, providing corporate customers with 3D development as well as making games. In 2007, he pulled together a team of former colleagues to build an open-source 3D engine, which now forms the basis of Yogurtistan.
Yogurtistan is currently in private beta.
The parent company, Yogurt AS, is based in Instanbul, Turkey. It has 20 employees and has raised a total of $3.8 million in funding to date, led by Golden Horn Ventures.
“Ecommerce in Turkey is really taking off,” said Menlo Ventures managing partner Shervin Pishevar said in the judging panel following the startup’s DEMO presentation. I can see it being popular there and… expanding to other markets, but I’m not sure U.S. consumers will shop in that way — yet.”
Yogurt AS is one of 80 companies chosen by VentureBeat to launch at the DEMO Spring 2012 event taking place this week in Silicon Valley. After we make our selections, the chosen companies pay a fee to present. Our coverage of them remains objective.
http://www.yogurtistan.com/
https://apps.facebook.com/yogurtistan/
Subscribe to:
Posts (Atom)
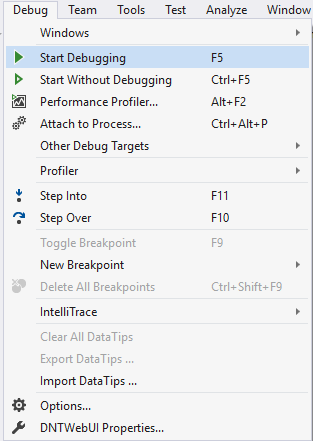
Visual Studio Keyboard Shortcuts
Playing with keyboard shortcuts is very interesting and reduce the headache of using the mouse again and again while programming with visu...
-
Delete: /YOUR PATH TO WORKSPACE/.metadata/.plugins/org.eclipse.core.resources
-
Playing with keyboard shortcuts is very interesting and reduce the headache of using the mouse again and again while programming with visu...
-
Unity NavMesh vs Apex Path vs A* Pathfinding Project Update June 2017: Unity 5.6 comes with improved NavMeshes! They are now component-b...

