Oct 21, 2009

Ogre on Ubuntu

Ubuntu / Kubuntu

The following guide is for Ubuntu 8.04 and newer. For older versions please go here

Please post feedback in this thread

I will not do a lot of explaining here and will assume that you know what each command does or at least know how to look it up. This is a guide to get you up and running as fast as possible on Ubuntu.

  • Go to some directory you have write access to.


cd ~/Desktop
  • Uncomment all Ubuntu repositories in sources.list.
sudo nano /etc/apt/sources.list
  • Run apt-get update.
sudo apt-get update
  • Install necessary packages.
sudo apt-get install pkg-config build-essential autoconf automake libtool libzzip-dev libxt-dev libxxf86vm-dev \
libxrandr-dev libfreeimage-dev nvidia-cg-toolkit checkinstall libfreetype6-dev libpcre3-dev libopenexr-dev \
freeglut-dev mesa-common-dev libtiff4-dev libglademm-2.4-dev libcppunit-dev libxaw7-dev libxaw-headers libois-dev
libxaw-headers is obsolete on Ubuntu 9.04 and can be dropped from the list.
A sufficiently recent version of OIS (at least for Ogre 1.6.x) is available in the libois1 and libois-dev packages, and at least for 9.04 and beyond (older Ubuntu versions not tested).
Many of these packages may already be installed, but this list makes sure we've covered all the bases.
  • Setup OIS (Object Oriented Input System) -- note that this is potentially obsoleted if libois-dev and libois1 are present for your distro version:
wget http://downloads.sourceforge.net/wgois/ois_1.2.0.tar.gz
tar xzf ois_1.2.0.tar.gz
pushd ois
aclocal && ./bootstrap && ./configure
make && sudo make install
popd
  • Setup CEGUI (Crazy Eddies GUI System):
wget http://downloads.sourceforge.net/crayzedsgui/CEGUI-0.6.0.tar.gz
tar xzf CEGUI-0.6.0.tar.gz
pushd CEGUI-0.6.0
aclocal && ./bootstrap && ./configure
make && sudo make install
popd
CEGUI-0.6.2 is available and can be used instead, but depending on system configuration you may need to add '#include ' to RenderModules/directfbRenderer/directfb-renderer.cpp
  • Setup Ogre3D:
wget http://downloads.sourceforge.net/ogre/ogre-v1-6-3.tar.bz2
tar xjf ogre-v1-6-3.tar.bz2
pushd ogre
aclocal && ./bootstrap && ./configure
make && sudo make install
popd
  • Complete installation:
sudo ldconfig
If during linking your program code, you get an error:
OGRE/GLX/OgreTimerImp.h:33:31: error: OgrePrerequisites.h: No such file or directory
Then add a '../' in the OgreTimerImp.h file so that it reads #include "../OgrePrerequisites.h" to find the file.

If it all ran fine you now have a dirty (but quick) source-compiled installation of Ogre3D, congratulations! The demos are located at /Samples/Common/bin/

If during execution you get an error such as:
(0) : fatal error C9999: *** exception during compilation ***
Cg compiler terminated due to fatal error

Then your Cg installation may be too old. Currently this appears to be the case with Ubuntu 9.04, which is providing Cg version 2.0.0015.

To get an updated version of Cg:
Visit the Nvidia download page to get the appropriate architecture: http://developer.nvidia.com/object/cg_download.html
Do not extract the archive. You want to save it as the original .tgz file.

sudo apt-get remove nvidia-cg-toolkit
cd /
sudo tar xzf path/to/Cg-X.X_DATE_ARCH.tgz

You may wish to recompile Ogre to ensure it picks up any changes in the Cg version. (cd ogre; make clean; make; sudo make install)

Enjoy.


error: ‘ILvoid’ was not declared in this scope

-> replace "ILvoid" with "void"

Oct 14, 2009

Osmo Organizer

[Howto] Compile & Install Osmo Organizer

Osmo is a great little organizer (or as they put it "A Handy Personal Organizer"), with a nifty tabbed display which integrates a Calendar with Tasks, Contacts and Notes in a single app.

Here's a (post-configured) screenshot - default config looks godawful, with HUGE fonts and horrible colours.


Now, Osmo still isn't pre-compiled or distributed in binary format, so if you want to try it out, you'll have to get your hands dirty. Not too much, it's pretty easy.

1.
First things first, so... we have to go and get the source --> here (that's Osmo's sourceforge)

When I wrote this [Howto] latest version was v0.1.6. (updated - 20071224)

2.
Let's open up a terminal, and extract the source with the following command (make sure you cd to the folder to where you downloaded the .tar.gz file)

Code:
tar xvf osmo-0.1.6.tar.gz
And then cd into the created folder with Osmo's source code.

3.
It's time to satisfy the app's dependencies. From reading Osmo's homepage, we know it depends on libxml2 and libgtk2.0 ( version >= 2.10 ). Ubuntu's Gutsy repos satisfy those dependencies, but chances are you won't have the -dev packages installed for compiling. Just to make sure we use the terminal to

Code:
sudo aptitude install libxml2 libxml2-dev libgtk2.0-dev libgettext-ruby1.8
That should bring a few extra packages attached, if you didn't have them installed previously. If you can afford an extra 15MB of downloads and around 50MB of HDD space, go ahead and do it. You can always remove both those -dev packages and the extra stuff after compiling Osmo.

N.B.: libgettext-ruby1.8 has been reported by a few people to be a, probably, unexpected dependency. It's happened a few times due to an internationalization dependency regarding package "msgfmt" which is included in libgettext-ruby1.8. So if compilation throws out a "msgfmt" error, be sure to include mentioned package

N.B.2: Version 0.1.6 released the 24th December added iCalendar file support. Both libical and libical-dev are not present in Gutsy's repos, though they are in Hardy's and haven't been backported (at least not to my knowledge). Those two packages are needed to have iCalendar's support enabled, so only Hardy users will be able to take advantage of that specific new feature.

4.
When you have all dependencies lined up, it's a pretty straightforward process.

Code:
./configure
it shouldn't throw around any errors, if all went well until now. And then, to finish it off...

Code:
make && sudo make install
or alternatively you can use checkinstall instead (which will add the app to Synaptic, making it easier to manage/remove later on)

Code:
make && sudo checkinstall -D
(Checkinstall will also upgrade the old installed version, should you decide to compile a newer one)

That way it'll also create a .deb file for you to keep and install on other machines you may have.

Et voilá!

Launch Osmo at the terminal to test it out (just type "osmo" and it'll launch immediately, and create the appropriate launcher for your specific DE. Enjoy your new private virtual secretary.

I'm using it specifically with Claws-Mail and it's only too bad they don't share/synchronize the address book, looks like something I'll be requesting (as well as the ability to copy notes from one day to another). Take a look at the date calculator, it's pretty... handy, as well!

Oct 13, 2009

How to get this fancy Ubuntustudio-theme in Ubuntu

You sure hear of Ubuntustudio which was released recently. “A multimedia creation flavor of Ubuntu. Ubuntu Studio is aimed at the GNU/Linux audio, video and graphic enthusiast as well as professional.” Maybe you have seen the nice theme too (like the screenshot on the right)

I will show you now how you can get this theme on your ordinary Ubuntu Feisty.

  1. Add the ubuntustudio repository to you sources.list and download the key and update:
    sudo su -c 'echo deb http://archive.ubuntustudio.org/ubuntustudio feisty main >> /etc/apt/sources.list'
    wget -q http://archive.ubuntustudio.org/ubuntustudio.gpg -O- | sudo apt-key add - && sudo apt-get update
  2. Then install the packages as follows:
    sudo apt-get install ubuntustudio-gdm-theme ubuntustudio-icon-theme ubuntustudio-look ubuntustudio-screensaver ubuntustudio-theme ubuntustudio-sounds
    I am neither sure if you need all this packages nor if there are some missing, but for me it worked fine ;-)
  3. Now activate the theme and wallpaper:
    1. Go to System -> Preferences -> Theme.
    2. Scroll down and choose UbuntuStudio (a nice dark theme).
    3. Click Apply Background
    4. Click Close
  4. If you want you can change the login manager too. (I did not because I use autologin and personally find the default ubuntu login manager nicer.
    1. To do this go to System -> Administration -> Login Window
    2. In the Local-Tab choose Ubuntu-Studio and click Close.

PS: The sound will be automatically applied. For the screensaver I do not know what is the ubuntustudio screensaver but it seems you have to set it manually.
Source: http://www.ubuntu-austria.at/printview.php?t=397&start=0

How to read the Comments in a pdf with acroread

I found nothing so I thought maybe acroread can do this. This is the Adobe Acrobat Reader for Linux.
  1. Get acroread per sudo apt-get install acroread.
  2. Open your pdf: acroread /path/to/your/file.pdf.
  3. Hover over the comment.

It’s a pity that evince does not support comments. For me the goal

to replace the multiple document viewers that exist on the GNOME Desktop with a single simple application

is not yet achieved. (Printing multiple pages on one A4 sheet does not work too).

OpenCV Links

  1. OpenCv Main: http://sourceforge.net/projects/opencvlibrary/
  2. To download : Download
  3. For Help : Forum
  4. Wiki Pages: http://opencv.willowgarage.com/wiki/
  5. OpenCv Yahoo group: http://tech.groups.yahoo.com/group/OpenCV/
  6. Useful OpenCV Forum: http://www.bernardotti.it/portal/forumdisplay.php?f=7
  7. OpenCv Japan: http://opencv.jp/
  8. Samples: http://opencv.jp/sample/
  9. OpenCv China: http://www.opencv.org.cn/index.php
  10. OpenCv Korea: http://www.opencv.co.kr/
  11. OpenCV Swiki: http://alereimondo.no-ip.org/OpenCV
  12. OpenCV under WindowsCE
  13. OpenCV on Mac OS X
  14. OpenCV on the Cell ( Sony PLAYSTATION 3 )
  15. Introduction to programming with OpenCV
  16. Tutorials and Code Samples
  17. Examples and Lecture_demos
  18. Microsoft Visual C++ ile OpenCV kullanımı
  19. MFC ile OpenCv
  20. OpenCv yazıları (yassine benabbas)
  21. Motion,Tracking Feature and Contour Detection
  22. Implementing a Simple 2D Object Tracker
  23. OpenCV haartraining
  24. Haar Cascades
  25. Face Recognition
  26. Iowa State University Computational Perception dersinden
  27. Noah Kuntz - Tutorials 1
  28. http://opencv.wordpress.com/
  29. http://yester-place.blogspot.com/
  30. http://www.myopencv.blogspot.com/
  31. http://blog.csdn.net/hunnish
  32. http://nashruddin.com/tag/opencv
  33. http://blog.weisu.org/search/label/OpenCV
  34. http://blog.damiles.com/?cat=12
  35. http://blog.ednchina.com/opencv2008/31147/category.aspx
  36. http://www.computer-vision-software.com/blog/
  37. Introduction to OpenCV: 1 2 3 4 5
  38. İhsan Duyuncu TR - blog
  39. Hasan Fehmi TR- blog
  40. MATLAB & OpenCV
Reference: http://derindelimavi.blogspot.com/2009/01/opencv-linkleri.html

Oct 3, 2009

GBVS - Graph-Based Visual Saliency - How to Run ?

Graph-Based Visual Saliency (GBVS) or the standard Itti, Koch, Niebur PAMI 1998 saliency map has source code on http://www.klab.caltech.edu/~harel/share/gbvs.php

However, i run it on linux ubuntu and windows vista. I need to edit some files. It's a great tool for saliency...

ERROR 1: gbvs_compile.m

??? Error using ==> cd
Cannot CD to util (Name is nonexistent or not a directory).

Error in ==> gbvs_compile at 4
cd util

SOLUTION 1: Edit gbvs_compile.m. Edit the line
cd util
to
cd %PATH_TO_UTIL/util

And you'll be successful in compiling.


ERROR 2: While running simplest_demonstration command, you'll get
??? Error using ==> load
Unable to read file mypath: No such file or directory.

Error in ==> getFeatureMaps at 7
load mypath;

Error in ==> gbvs at 55
[rawfeatmaps motionInfo] = getFeatureMaps( img , param , prevMotionInfo );

Error in ==> simplest_demonstration at 4
out = gbvs('samplepics/4.jpg' );

SOLUTION 2: Edit getFeatureMaps.m
line : load mypath;
to
%load mypath;

ERROR 3: While running simplest_demonstration command, you'll get
??? Undefined function or variable 'pathroot'.

Error in ==> getFeatureMaps at 65
channel_files = dir( [pathroot '/util/featureChannels/*.m'] );

Error in ==> gbvs at 55
[rawfeatmaps motionInfo] = getFeatureMaps( img , param , prevMotionInfo );

Error in ==> simplest_demonstration at 4
out = gbvs('samplepics/4.jpg' );

SOLUTION 3: Edit getFeatureMaps.m
line:
channel_files = dir( [pathroot '/util/featureChannels/*.m'] );
to
channel_files = dir( ['PATH_TO_GBVS/util/featureChannels/*.m'] );


Then you'll get the result. Enjoy ;)


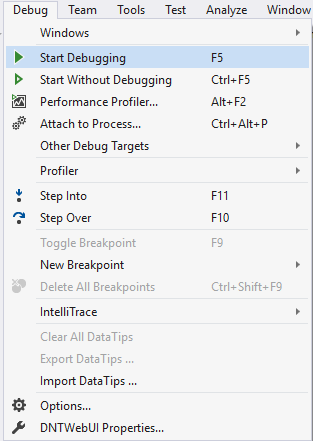
Visual Studio Keyboard Shortcuts

Playing with keyboard shortcuts is very interesting and reduce the headache of using the mouse again and again while programming with visu...